
Sienna Maker Jacket Review
Heyooo! I am so excited to share my new Sienna Maker Jacket. This pattern absolutely rules. Sewing this jacket was quite a big project and I cannot wait to make another version, it is that good.
A long denim jacket has been on my mind for quite some time. I saw something similar to my finished Sienna Maker Jacket pop up in my Instagram feed maybe about a year ago and I knew I wanted one then. I even reached out to the community for some pattern suggestions to rip off that rtw look, but to no avail. So it just crept to the bottom of my sewing list until… Ta-da! There it was, a new jacket pattern released by the amazing Closet Case Patterns. The Sienna Maker Jacket, a jacket designed with makers in mind!
The Pattern
It was love at first sight and I bought the pattern immediately, which I rarely do by the way. I love the vintage style of this pattern. The Sienna Maker Jacket has three views, long medium, and short, with some cool options for buttons and a sleeve pocket. The pattern has the kind of in depth instructions and quality that we have all come to expect from Closet Case Patterns.
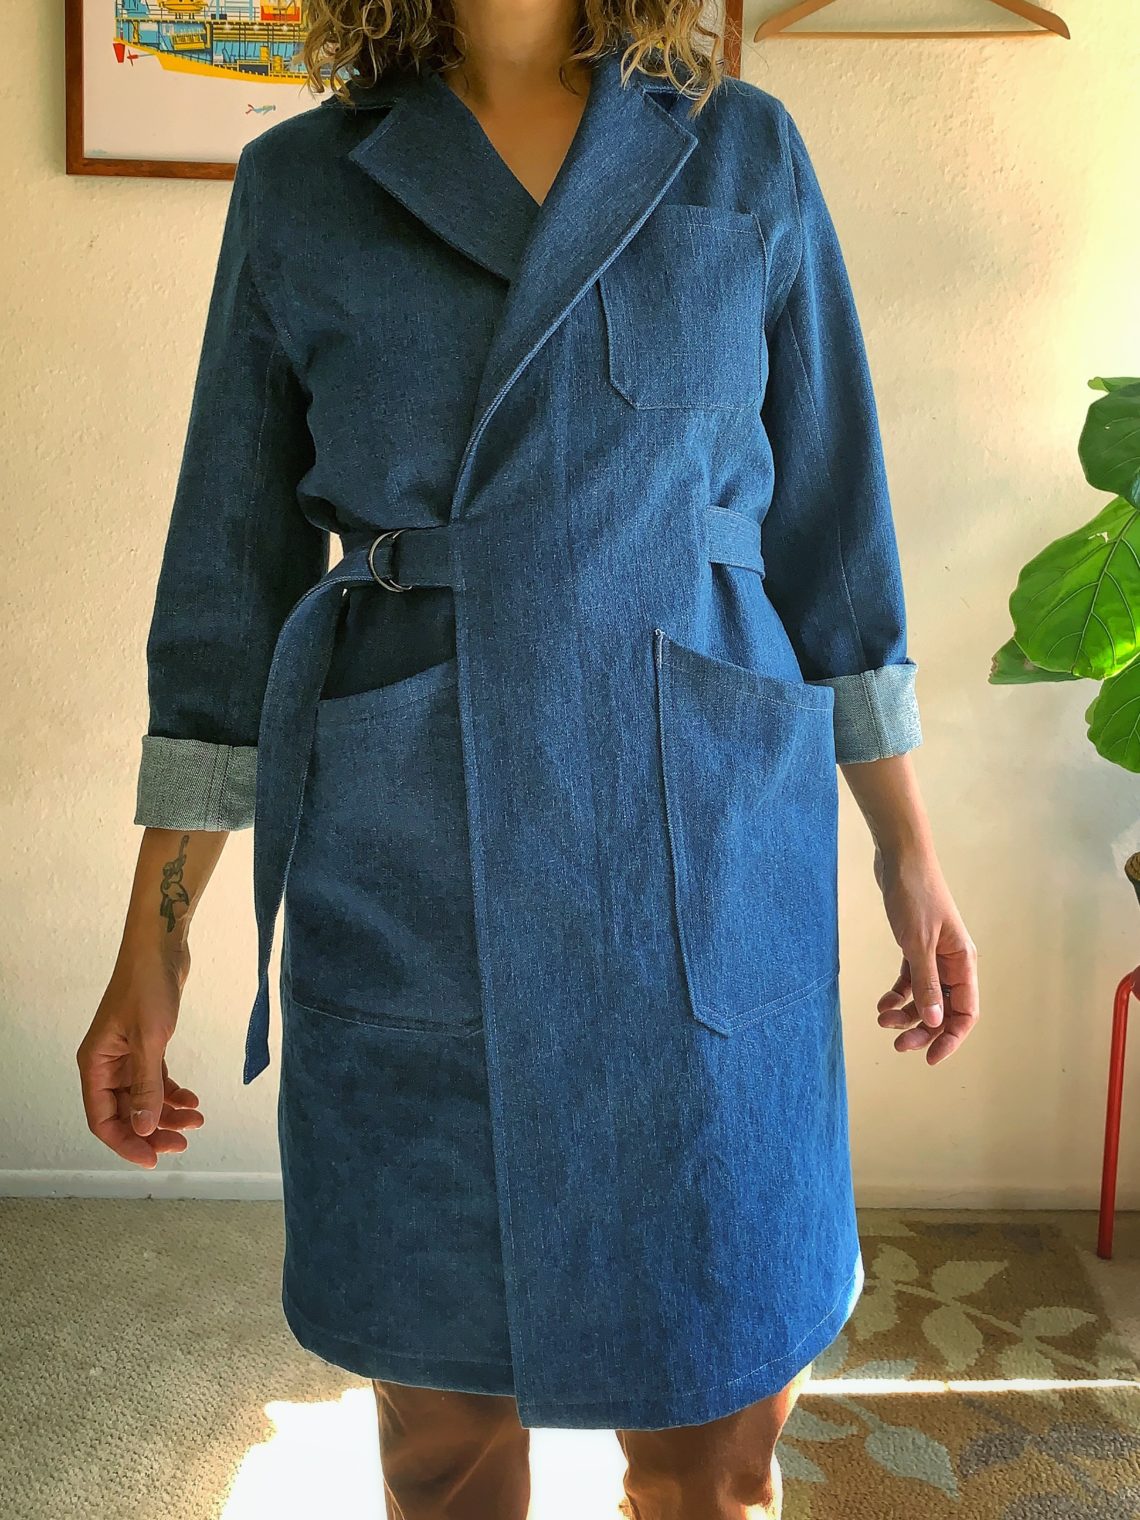
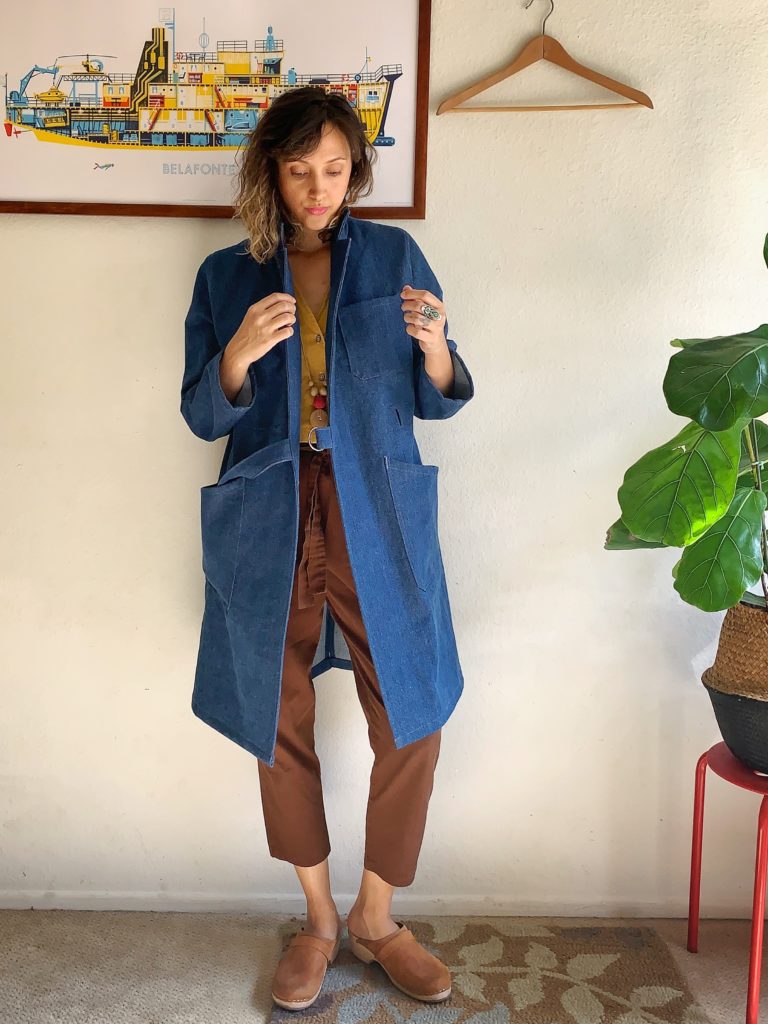
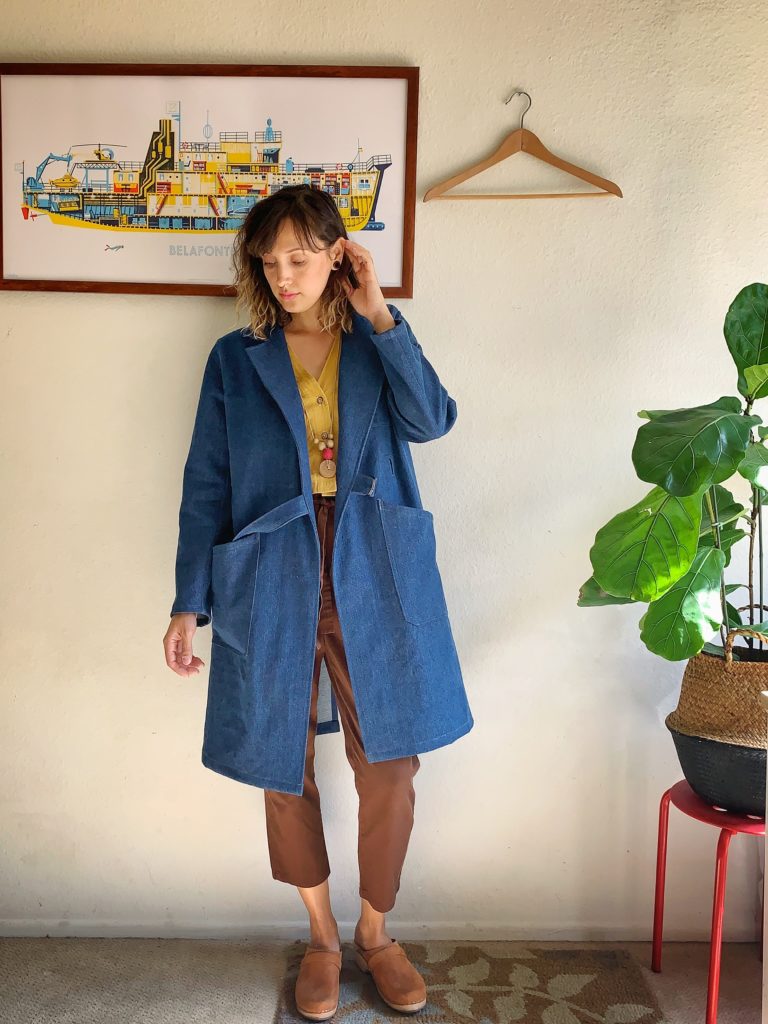
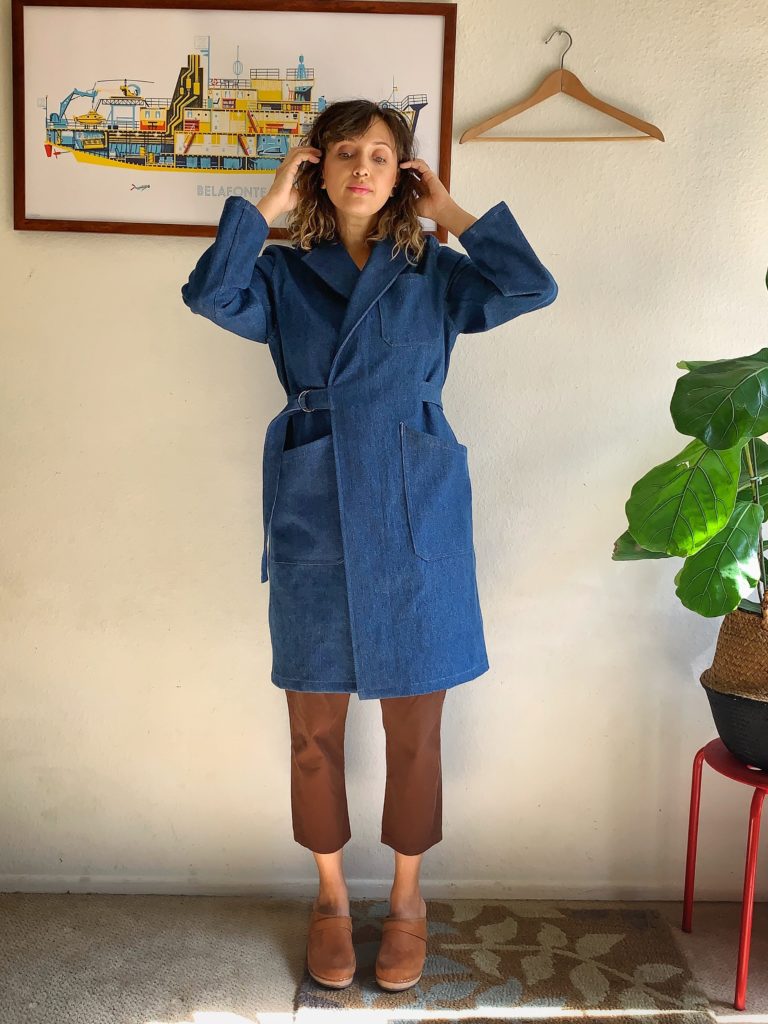
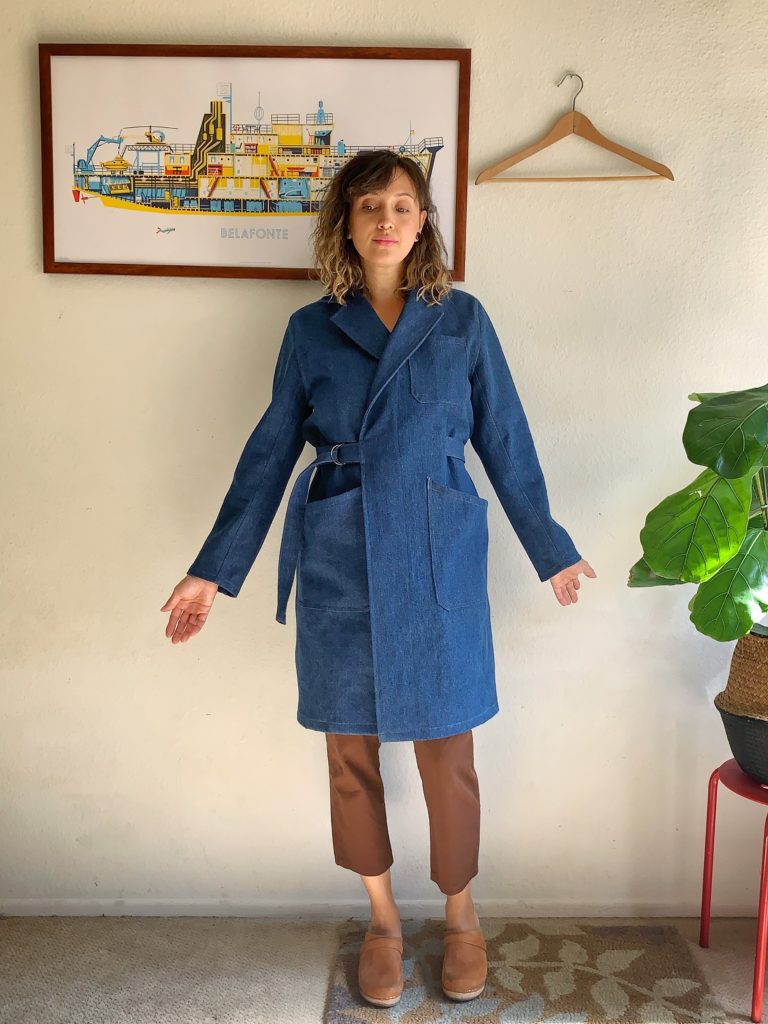
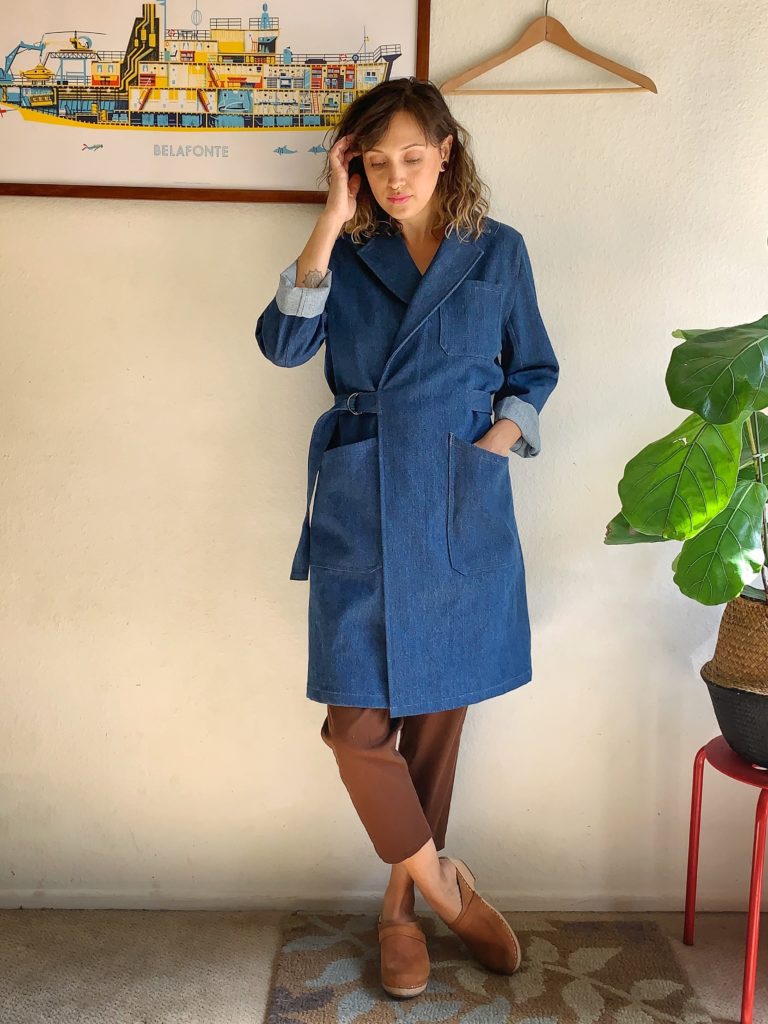
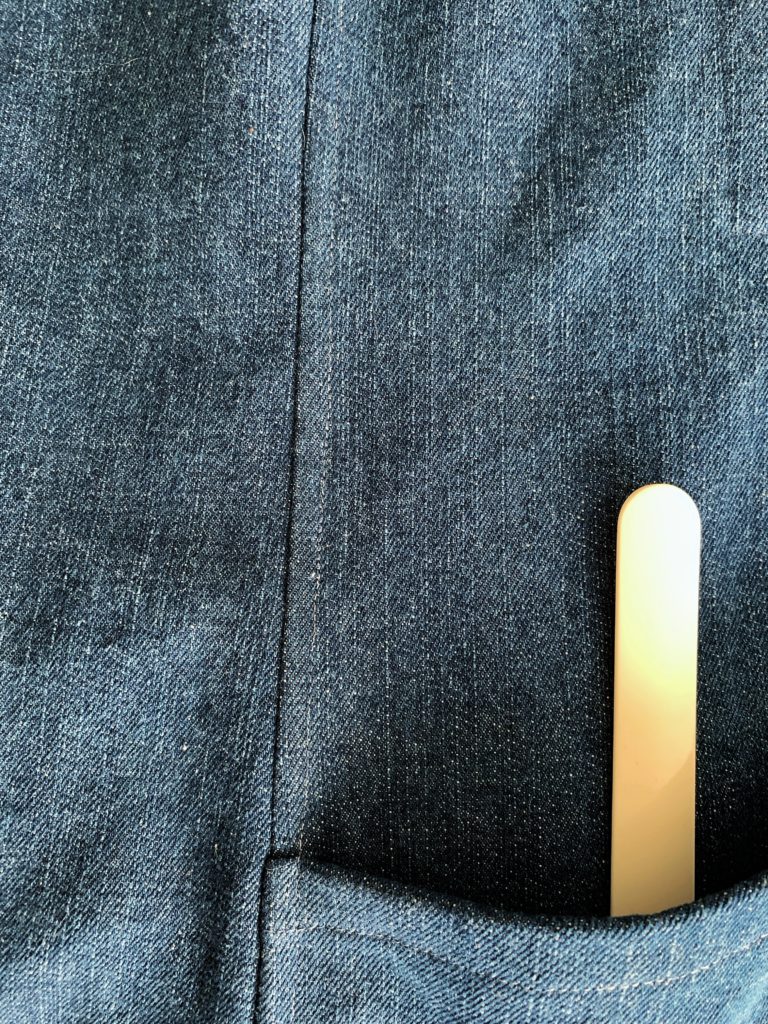
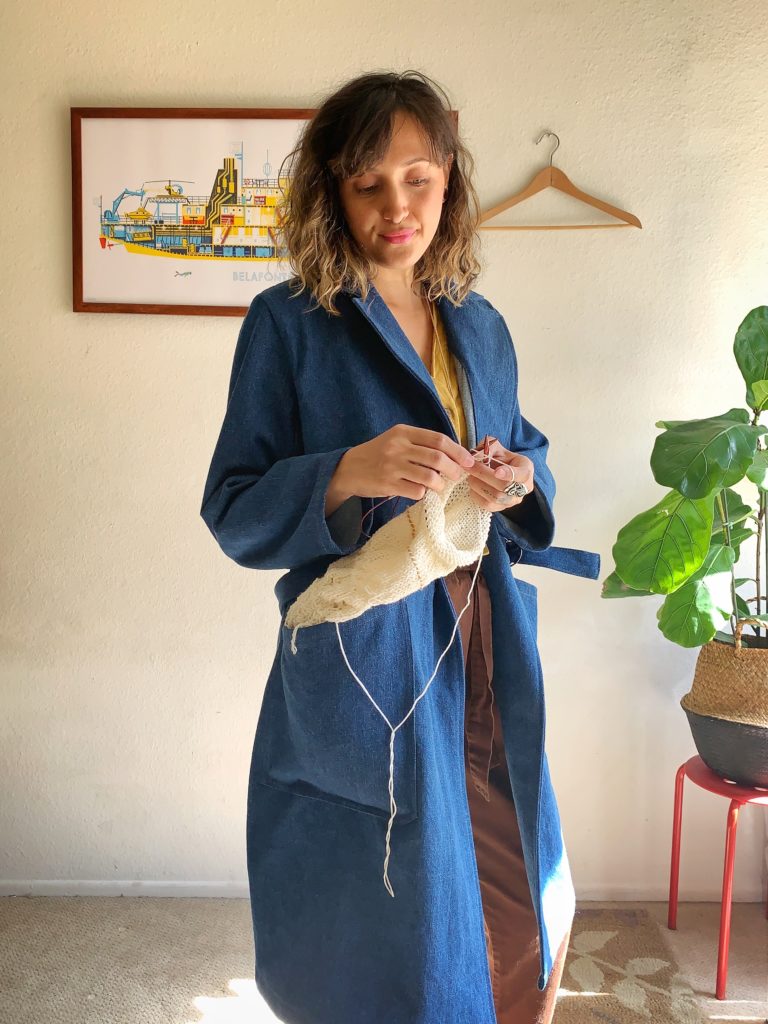
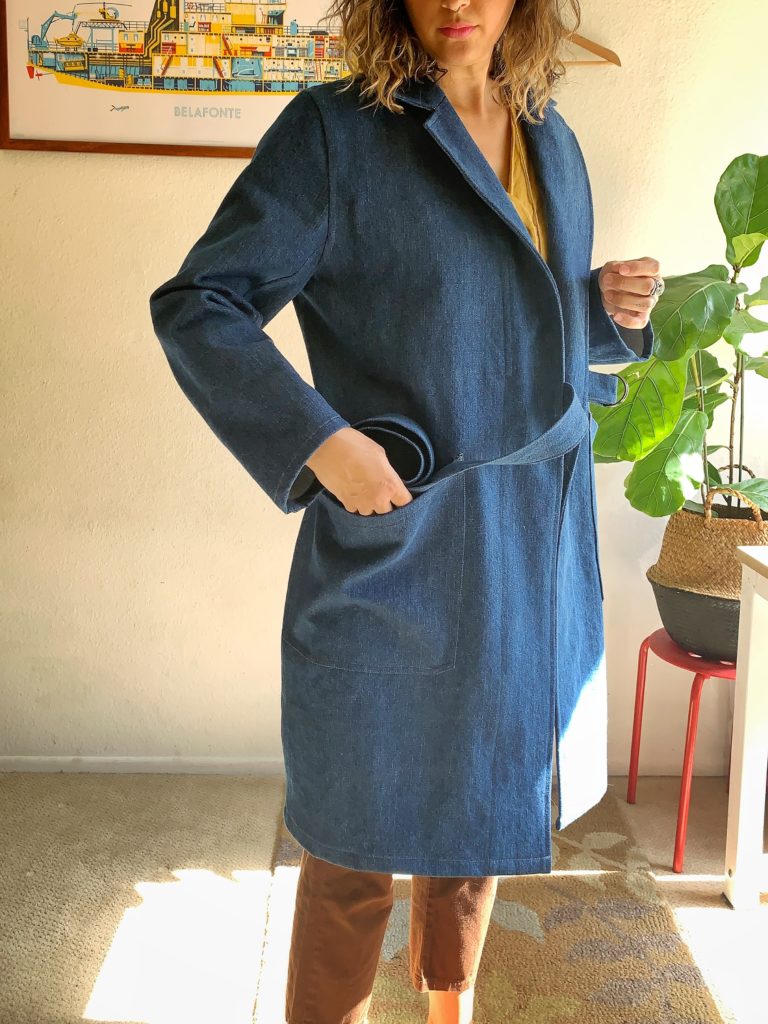
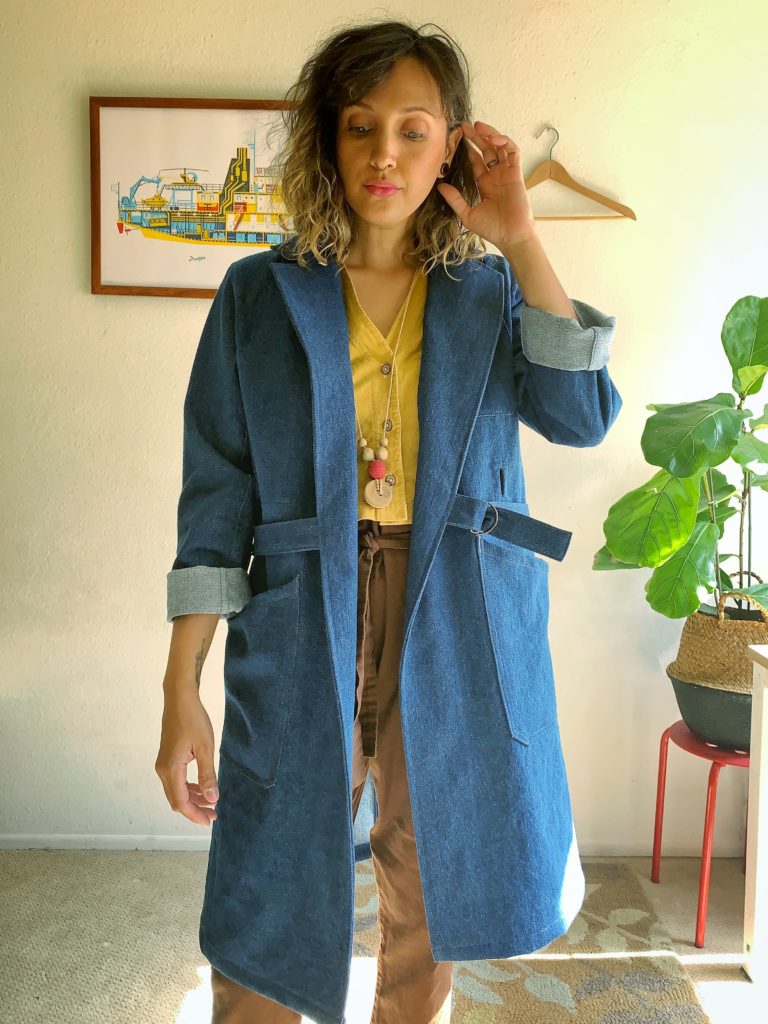
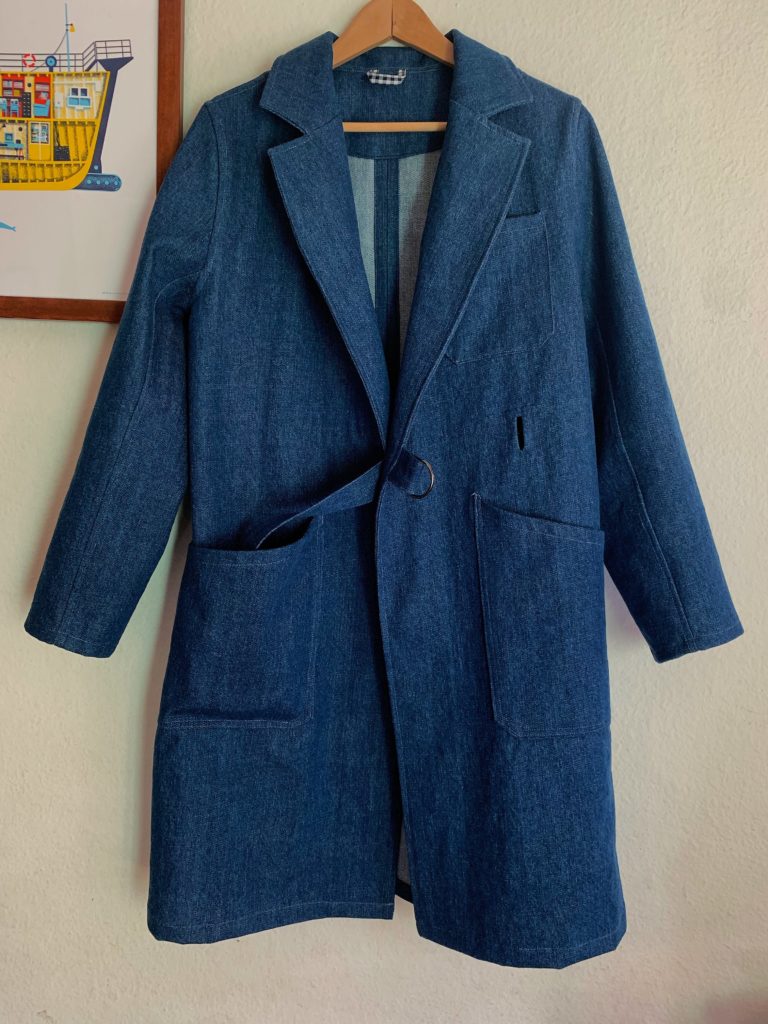
This time I chose the long version because that’s instinctively what I envisioned based on my inspiration. It is described as a utility jacket and the hip pockets are huge and super functional. The Sienna has a large breast pocket on the inside of the jacket as well. So cool!
The Fabric
The fabric I used is a 12 oz textured denim from Joann Fabrics. It’s a really nice, heavy, and durable fabric. I actually used this fabric before for a pair of Persephone Pants that no longer fit me. So when I was deciding on a medium blue denim for this project, it was one of the first that came to mind.
At first, I was worried that this denim would be too heavy for the Sienna Maker Jacket, but then I convinced myself to just go with it. Denim is supposed to withstand time and age well. I thought worst case scenario the jacket would be a little stiff at first, but at least it’ll last forever. Crossing my fingers anyway.
Sizing
My measurements basically put me in a size 10. I did measure a little larger through the bust than what Closet Case Patterns recommends for a size 10 but my waist and hip measurements were good. I was worried about sizing up because I did not want this jacket to fit too large in the shoulders. I’m really glad I didn’t! The size 10 fits great without any alterations. The Sienna size chart has really helpful measurements, including shoulders, so make sure and check that out when deciding on your size.
Supplies
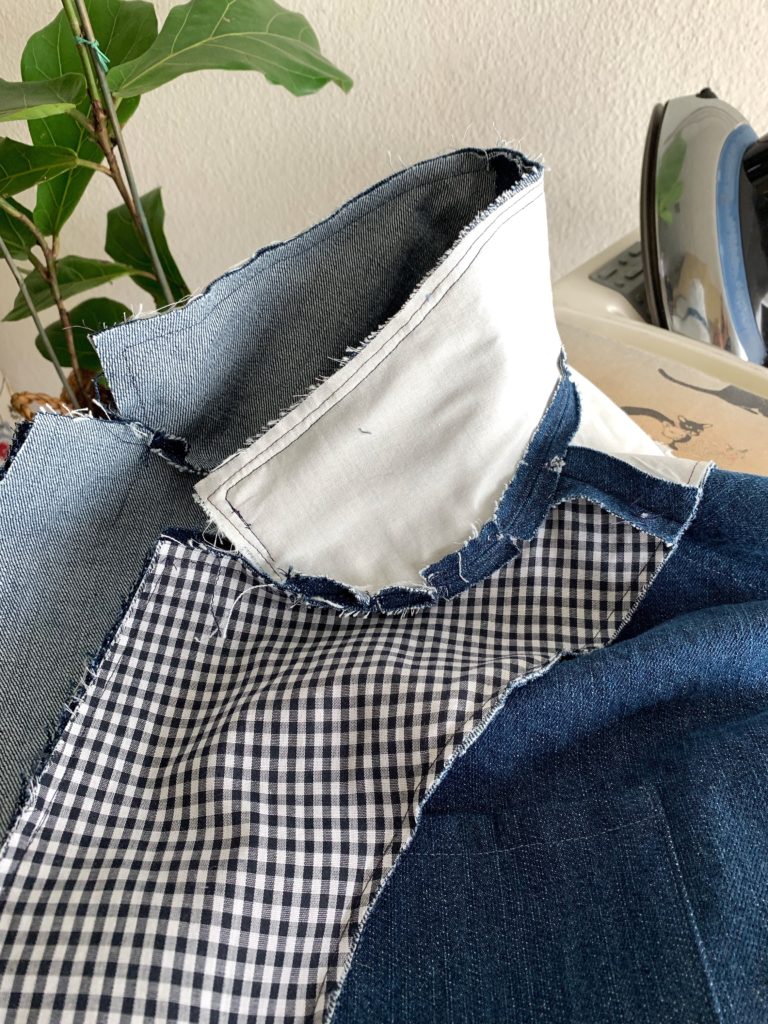
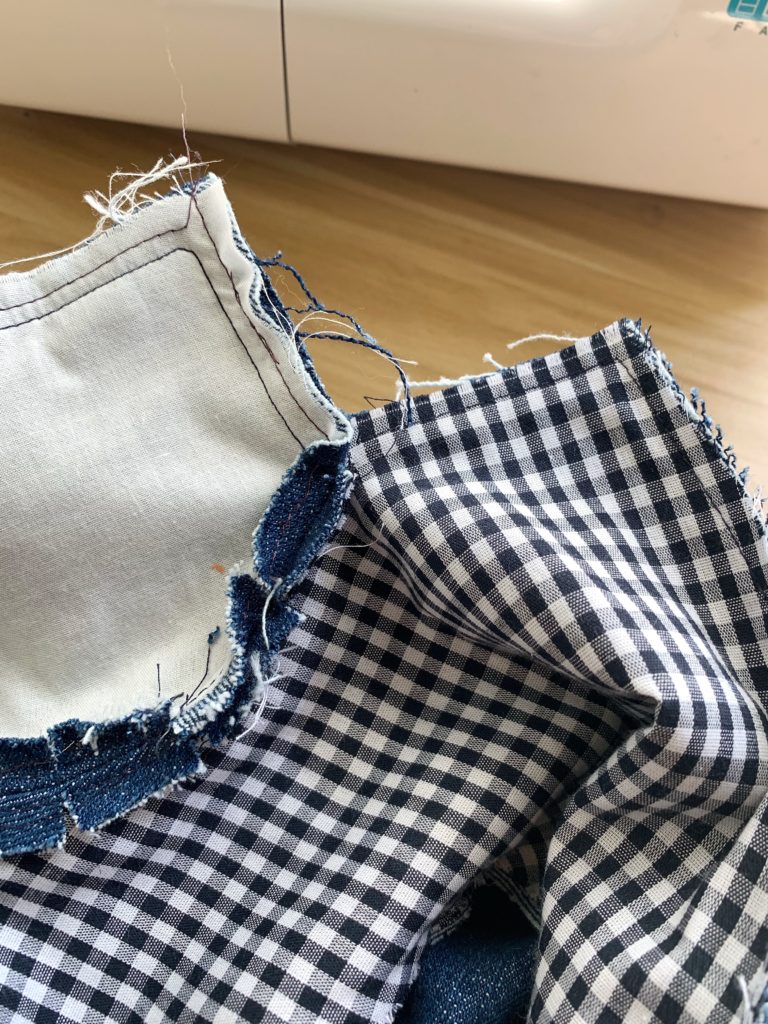
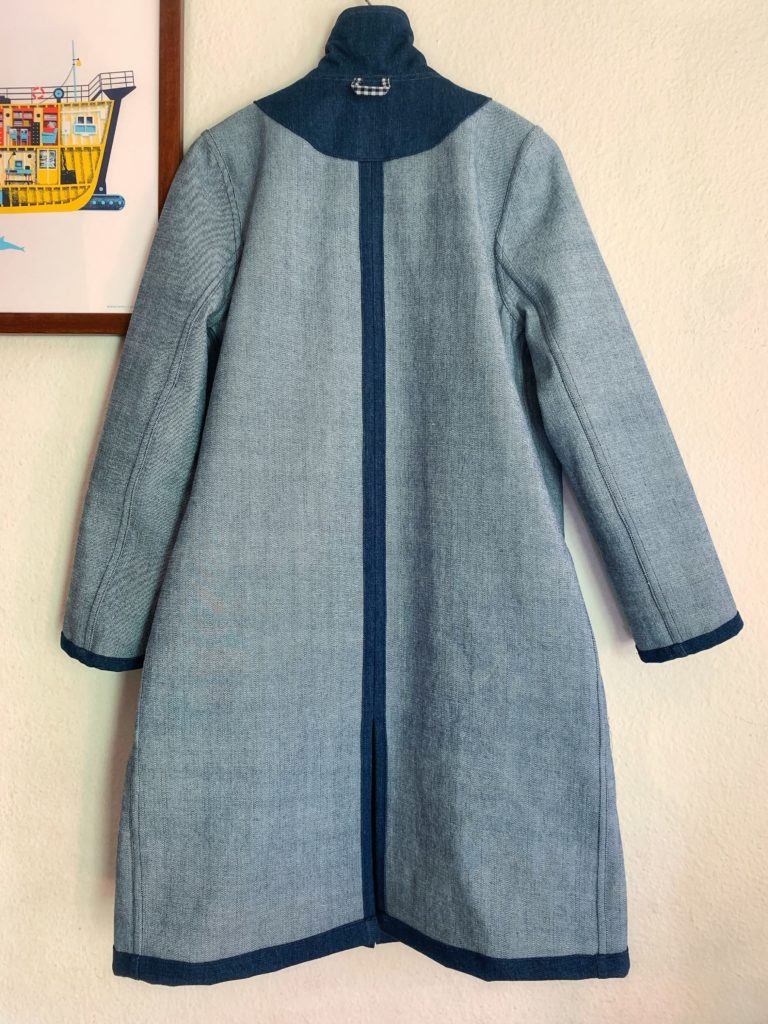
I chose to used lightweight cotton fabric for interfacing on this project. I haven’t experimented much in the past with using fabrics in place of fusible interfacing, but I decided that this would be a good opportunity to give it a go. I didn’t have a ton of the fusible stuff on hand, and I often become frustrated with fusible interfacing when sewing heavy fabrics. Add on the collar and I knew I was in for some challenges ahead.
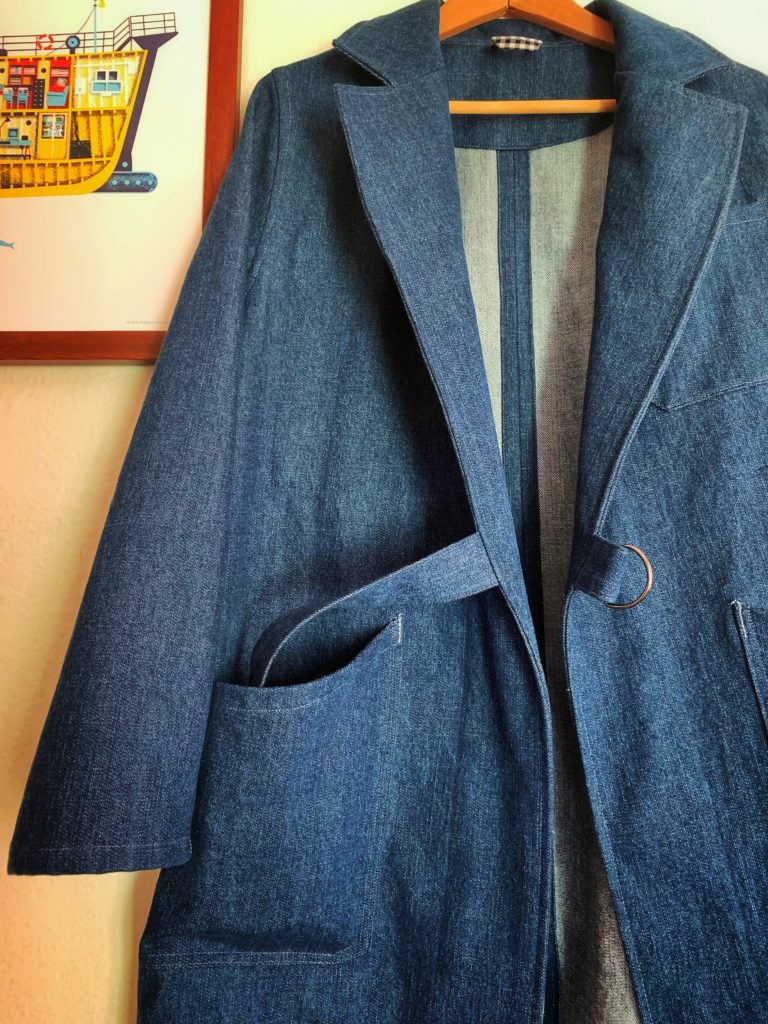
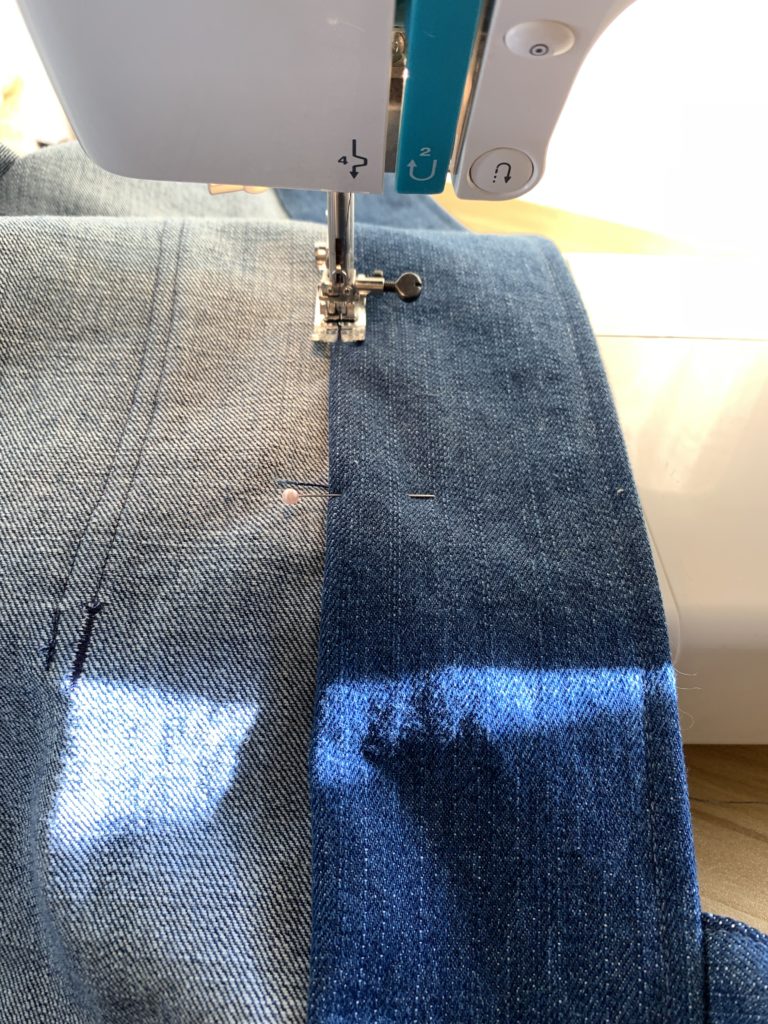
The fabric interfacings worked wonderfully on this. Instead of ironing on my interfacings I basted it to my facing pieces within the seam allowance which I actually preferred. The only area I chose to use fusible on was the Belt Vent Facing. The D-rings are from Joann as well. I decided to do most of the topstitching using this denim blue thread.

Construction
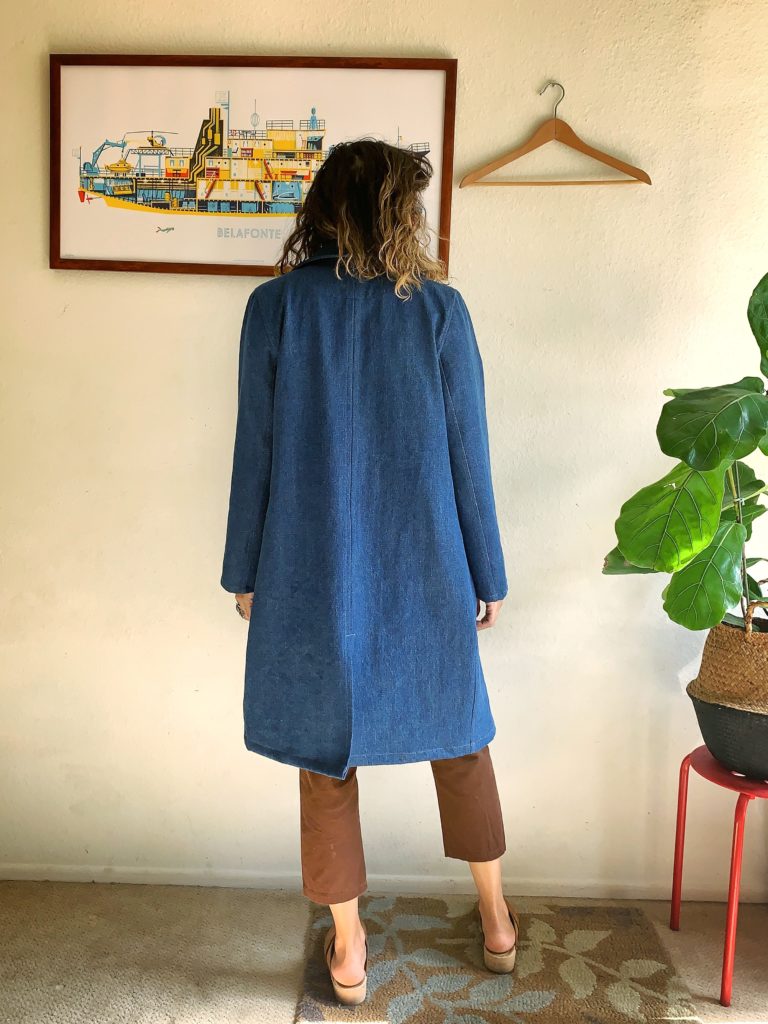
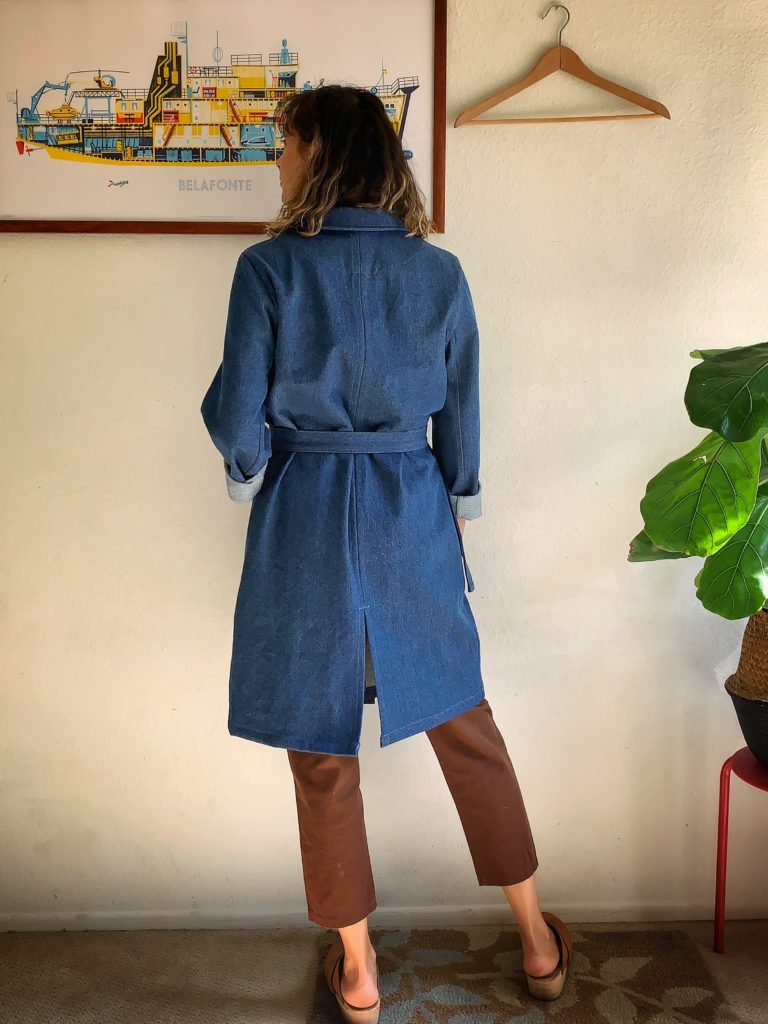
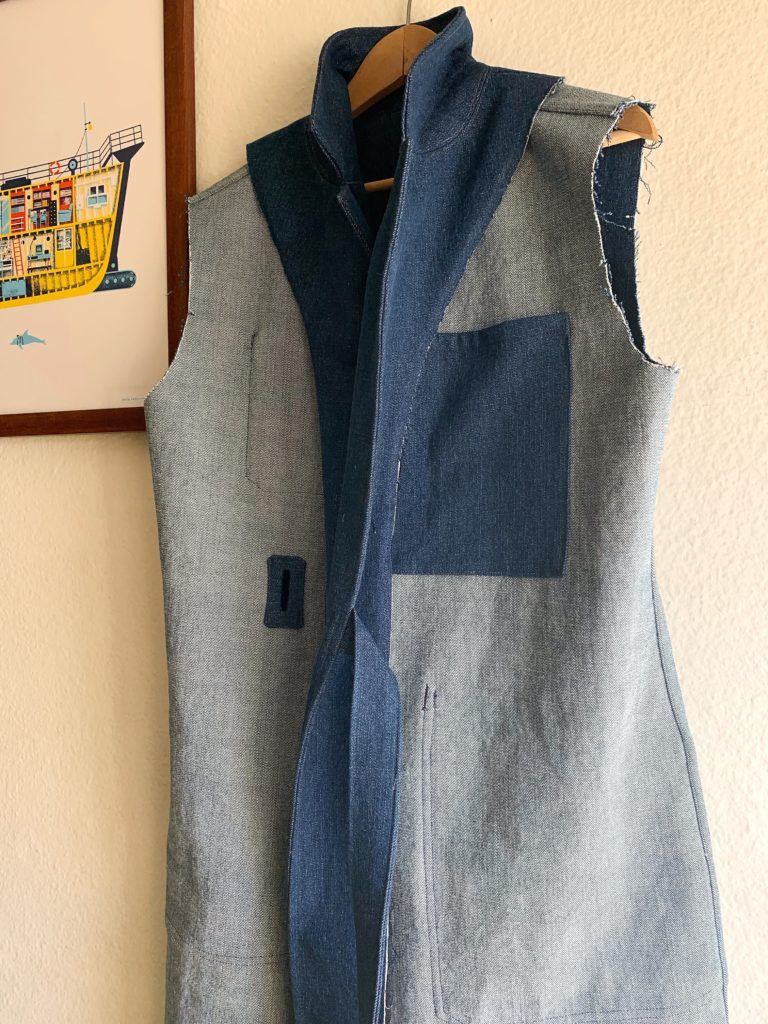
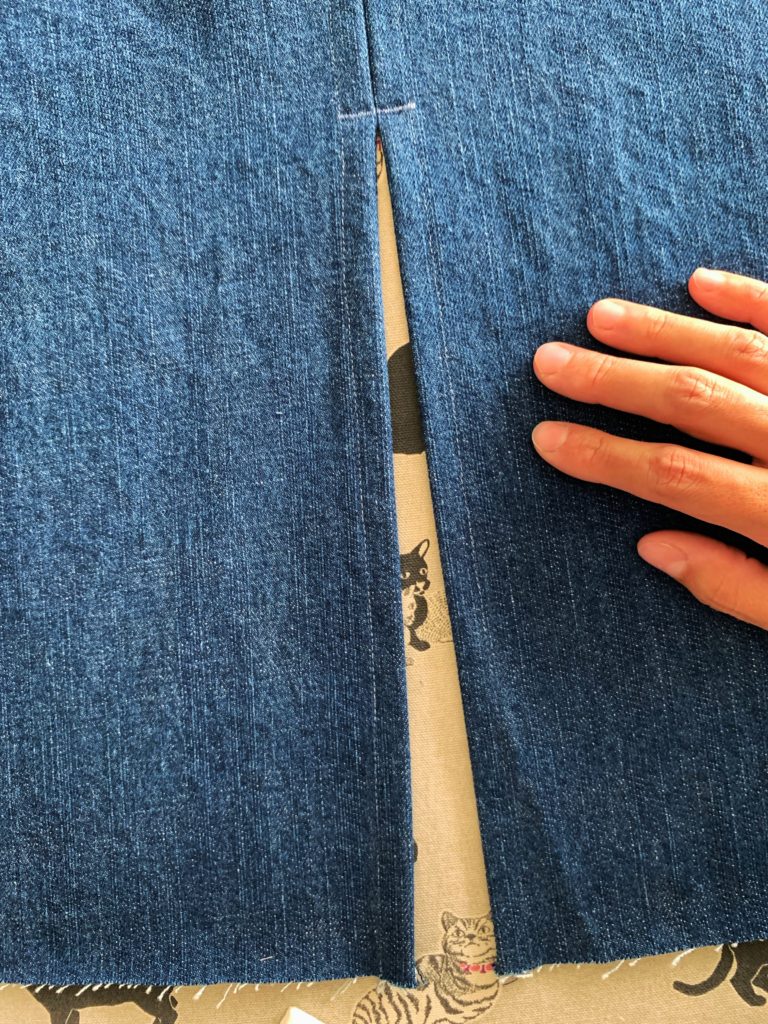
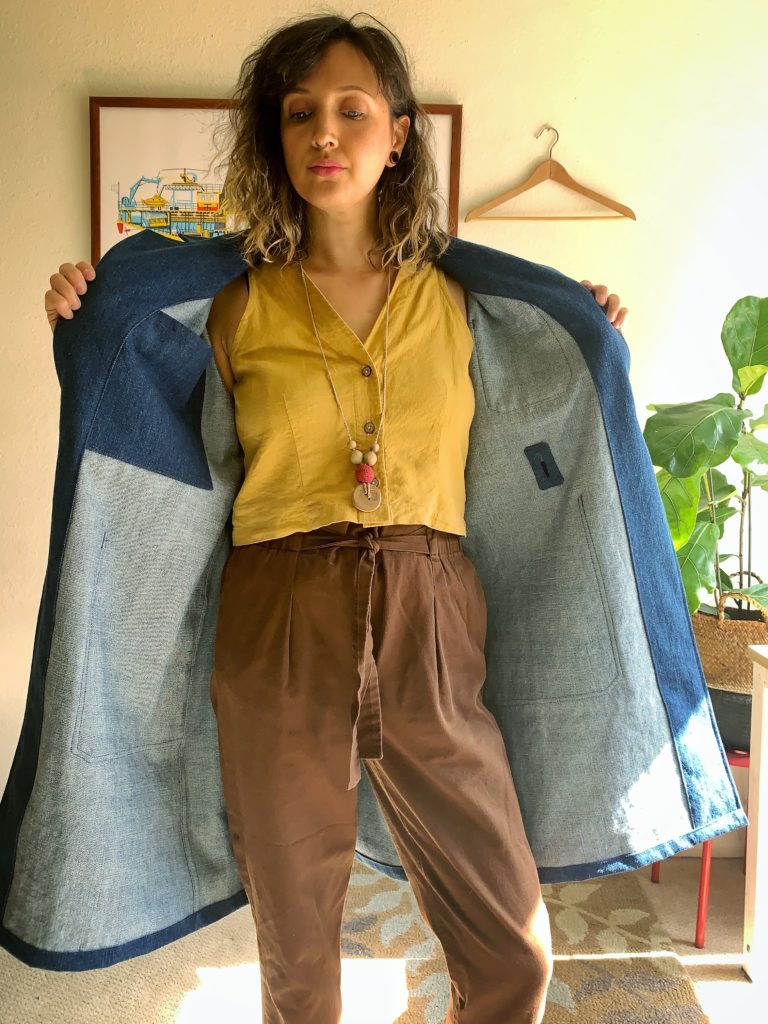
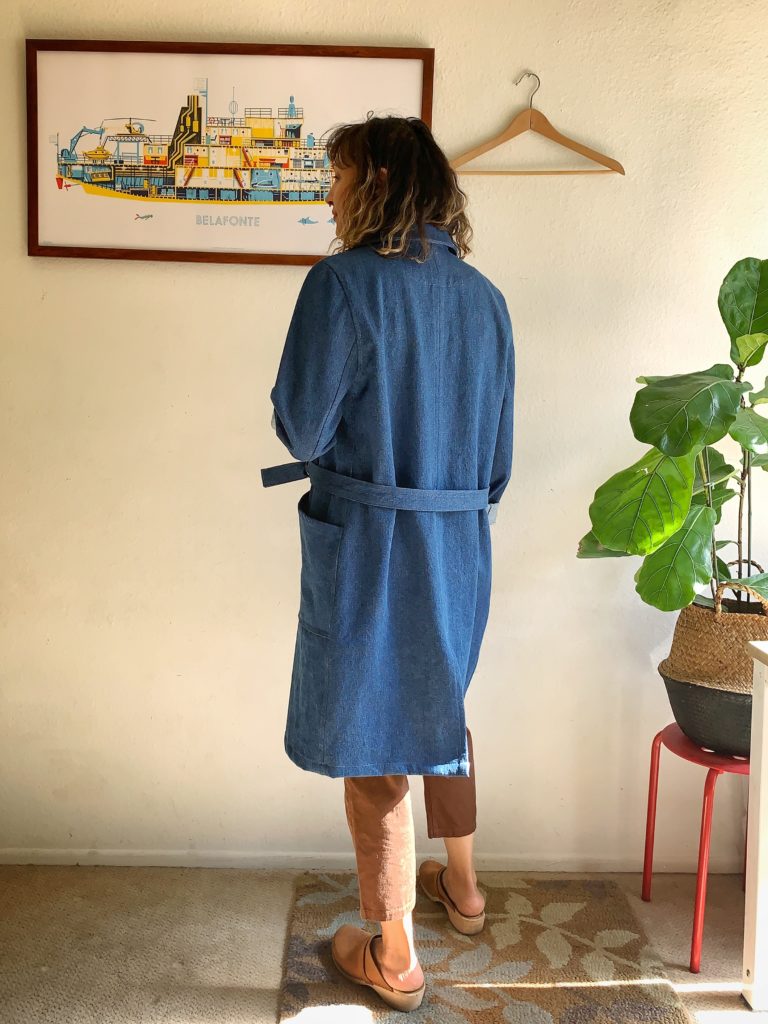
This was honestly a dream to put together but expect a fairly involved sew with this one. The Sienna is a labor of love. I enjoyed all of the pockets and topstitching, which really adds to the utilitarian vibe of the Sienna Maker Jacket. An interesting feature is that the large breast pocket that is sewing to the inside of the jacket ends up being partly covered by the facing which I found surprising and fun. The center back seam of the jacket is sewn with a hefty seam allowance to allow for a neat finishing around the back slit. All of the other seams are flat felled. The inside of this jacket is a thing to admire. Maybe I should wear it inside-out to show it off.
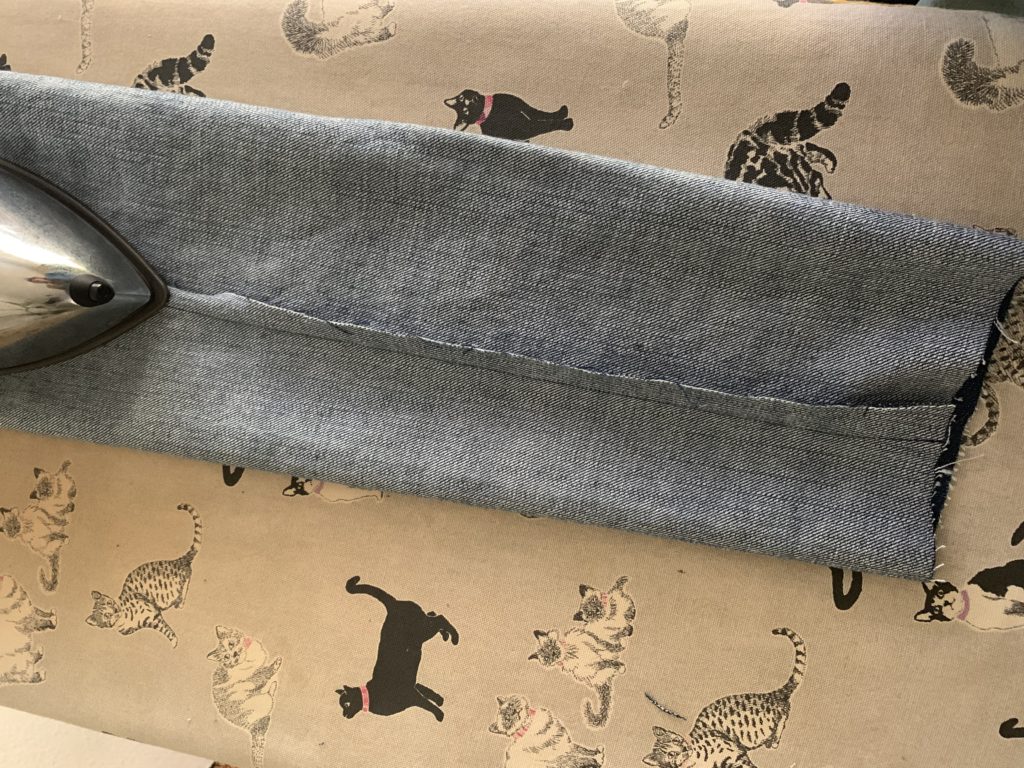
I should note that the Sienna has a three piece sleeve. It wasn’t recommended to flat fell the last sleeve seam, probably because the sleeve gets too narrow to finish in that fashion. I totally did it anyway. I couldn’t say I recommend it but at this point in the sewing process I just couldn’t bring myself to use the serger. I carefully broke it up into two parts, flat felling from the top of the sleeve and then the bottom, meeting somewhere around the middle.

Modifications
I made a couple of very small modifications to my Sienna. I decided to increase the size of the outer breast pocket. There isn’t a good explanation for this. I’m just obviously a little obsessed with big pockets and should probably quit it. The size of the pocket is drafted that way for a reason. It almost overlapped with the facing and could have been partially sewn over in the end (similar the the inside pocket described before) and luckily it just barely fit properly.
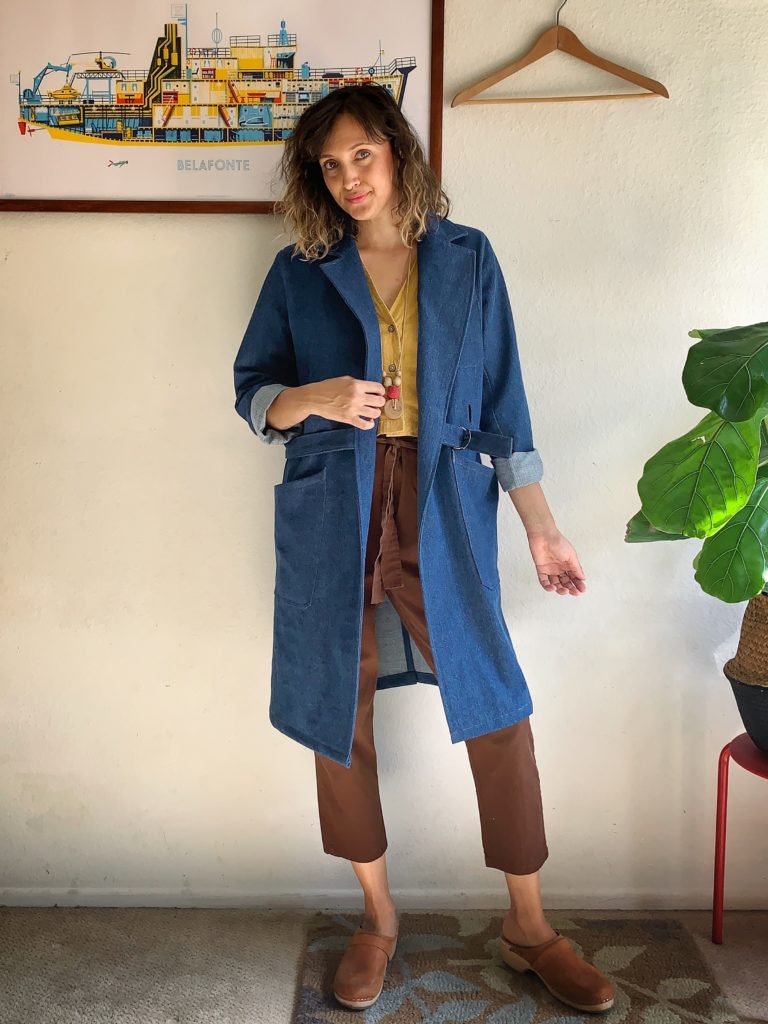
Secondly, I added juuuust a little under 2.5” to the length of the front, back and facing pieces of my Sienna Maker Jacket. A long jacket was the look I was going for and without measuring or muslining I just took a chance on this and added some length. I knew I could probably remove some if I needed to since I had only added length to the bottom of my pattern pieces. It ended up being perfect sitting right above the knee, and for reference I’m 5’8”.
The Belt
I thought it would be helpful to mention that the belt is essentially only on one side of the jacket front. Therefore, the belt is long and hangs almost to the ground when untied. As I saw mentioned by Heather Lou of Closet Case Patterns, I have tried rolling it up and placing it in my pocket. I’ve also tried wrapping it around the back of the jacket and then fastening it in the d-rings at the other side. Both of these options work really well and I believe these potential options add sort of a fun element to wearing the Sienna Maker Jacket. Scroll through my photo heavy post and you’ll see how I experimented with these options.
Final Thoughts
The collar and lapel have the most beautiful structure. Now having worn it around a bit I believe a heavy fabric works so wonderfully for the Sienna Maker Jacket pattern. It is surprisingly warm as well. This will be such a useful transitional piece as we approach the winter season. I thought about distressing this Sienna before it was completed but looking at it now I just love it as is. At least for now the idea of harming it is not a welcome one.
It’s pretty nice having this ability to make the thing you envision. We sewers can tweak a pattern, even just a little bit, to truly make it ours. It’s the best feeling. I’m really proud of my new Sienna Maker Jacket. Watching it age and fade will be fun.


13 Comments
Donna DeCourcy
You have done a lovely job of this pattern. Such inspiration is just what I’m looking for. Thank you.
Angie Hook
That is wonderful to hear, thank you for reading! <3
Paula Stafford
I’m interested in the denim coat you made from closet case pattern, tried to find it with no success can you please help me . Thanks Paula
Laura Jones
What a lovely make. I saw this pattern when ordering my Ginger jeans pattern. Love the styling. You did such a lovely job in this post. Thank you for taking the time and sharing your experience.
Angie Hook
That is very sweet. Thank you so much for reading. <3
Emily
Hi. I love that jacket and your review. Thanks so much for all the pictures. It makes me more confident about about the one I’m starting today. I’m curious about your decision to use non-fusible interfacing. Is there a reason you don’t like the iron-on stuff? Is it the polyester? Also, what fabric did you use to interface? Scrap cotton? I could definitely be tempted to go that way.
Thanks again!
Angie Hook
Hi! I’m so glad to hear that you found the blog helpful! I honesty have a sort of love/hate relationship with fusible interfacing. I love that is stays put and it is totally fine to use, but I haven’t found a heavier weight fusible that I love. When sewing collars I find that they can pull away from the fabric a bit with all of the stretching and manipulating. I believe I used muslin fabric as well, so yeah, just a simple light to medium weight fabric works if it holds it’s shape well. It’s fun to play with interfacing! Different brands and types, so many to choose from. Good luck!
Suzanne
Just Wow! Until now, I have not been interested in the Sienna Makers Jacket. You’ve hit this out of the park! So glad I found your blog, but it seems you have been blogging lately, sadly. I initially came for the Intrepid boiler suit and now I’m thinking about my own Maker’s jacket in the extended length! Thanks for sharing your work.
Irma
Hi! I stumbled upon your review of the Sienna Jacket and absolutely love your version and your detailed review, thank you! Definitely buying the pattern, it will be my first jacket so fingers crossed. By the way, I really like the yellow top you’re wearing in the pictures. Is that RTW or did you make it? If you made it, could you share the pattern name please? Thanks!
Angie Hook
Hey Irma! Thank you so much! The yellow top is actually a pattern hack that I believe I posted about waaaay back in my IG feed. If my memory serves me correctly it’s a hack of the Fringe pattern by Chalk & Notch. I remember wanting to use the shape of their button placket. I simply modified the shoulder seam and lengthened the bodice a tad to make a cropped tank. I may have taken in the side seams as well. Hope that helps!
C A Oakley
Great jacket and a really useful review. I’m about to try this in a sort of heavyweight ponte – as a toile – do you think that’ll work ok?
Linda
I have just bought this pattern and think you made such a lovely garment from it. You;ve inspired me to try making it with denim fabric. Your seams look great – is that part of the instructions? Is that a french seam you used?
Best Linda
Angie Hook
The instructions are very detailed, including seam finishes. Thanks and good luck! 🙂