Bob Pants and Kabuki Tee Review
I made two new things! The Bob Pants and Kabuki Tee are both very wearable separates with an interesting twist. Although these are quick and easy to sew up, I thought I’d share some of the details on the blog for anyone interested in making these great patterns.
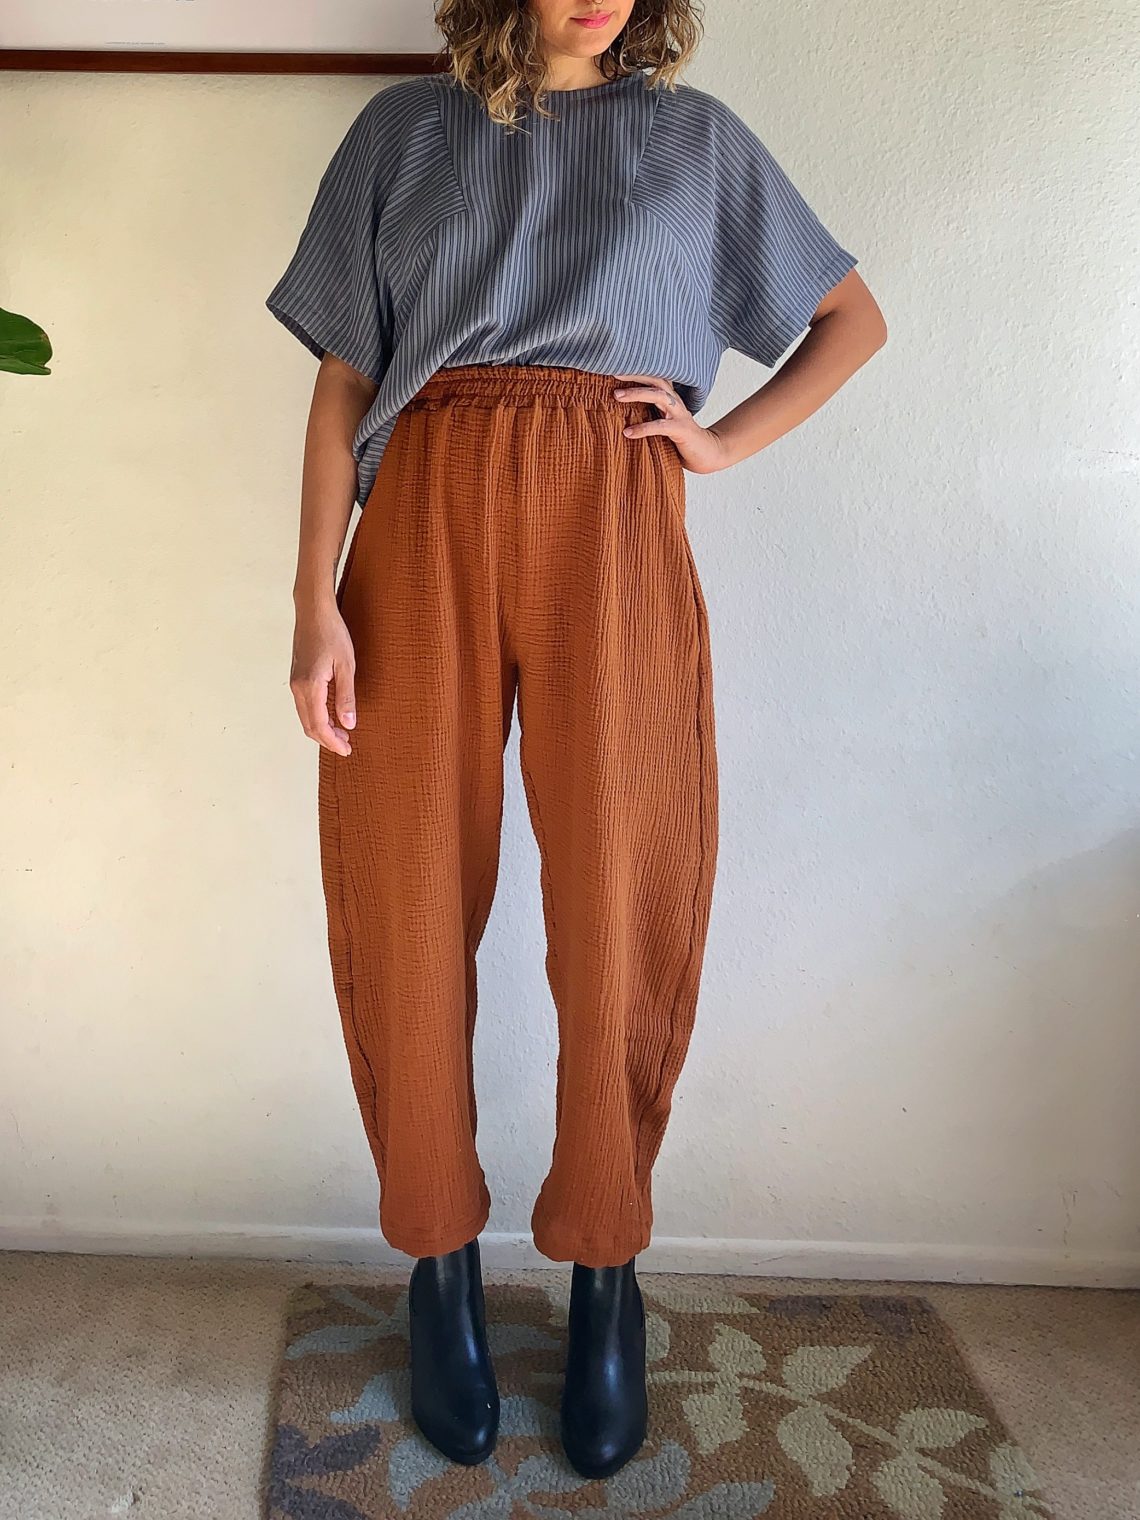
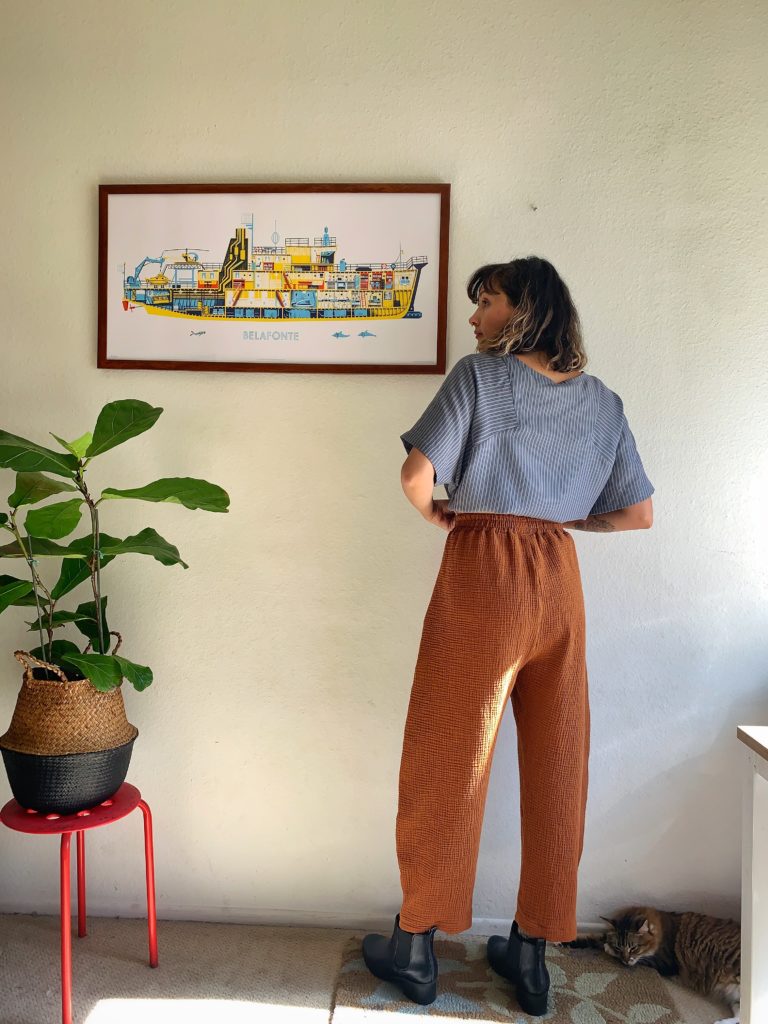
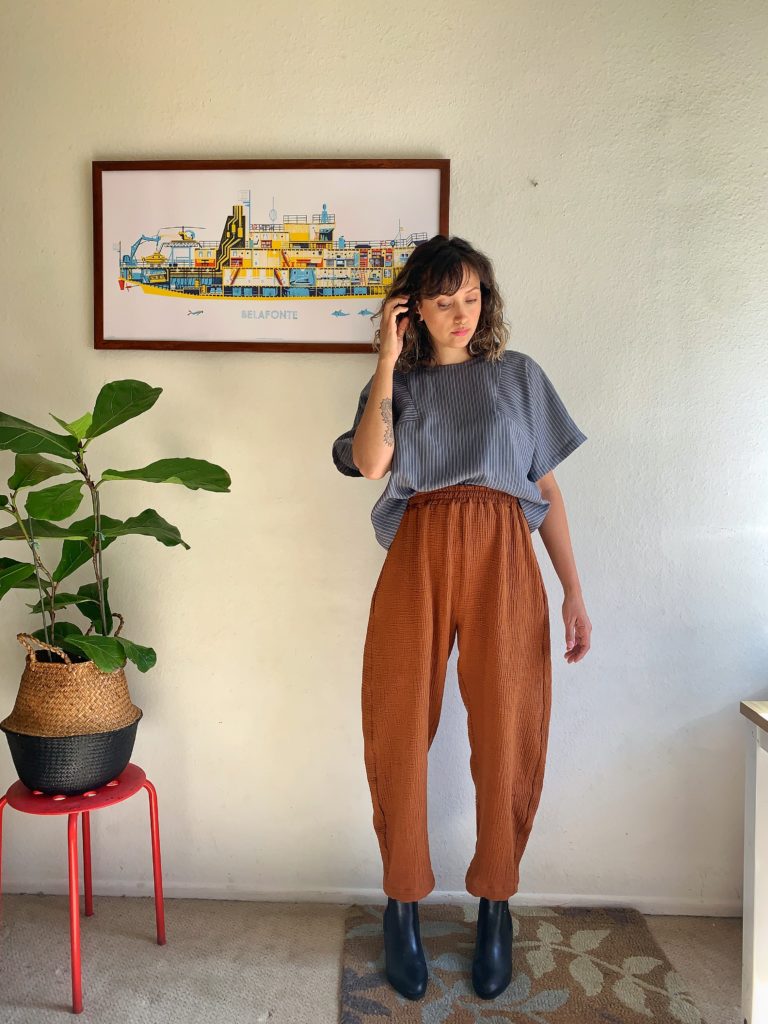
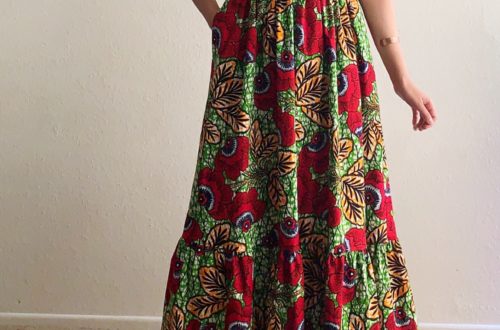
Style Arc Bob Pants
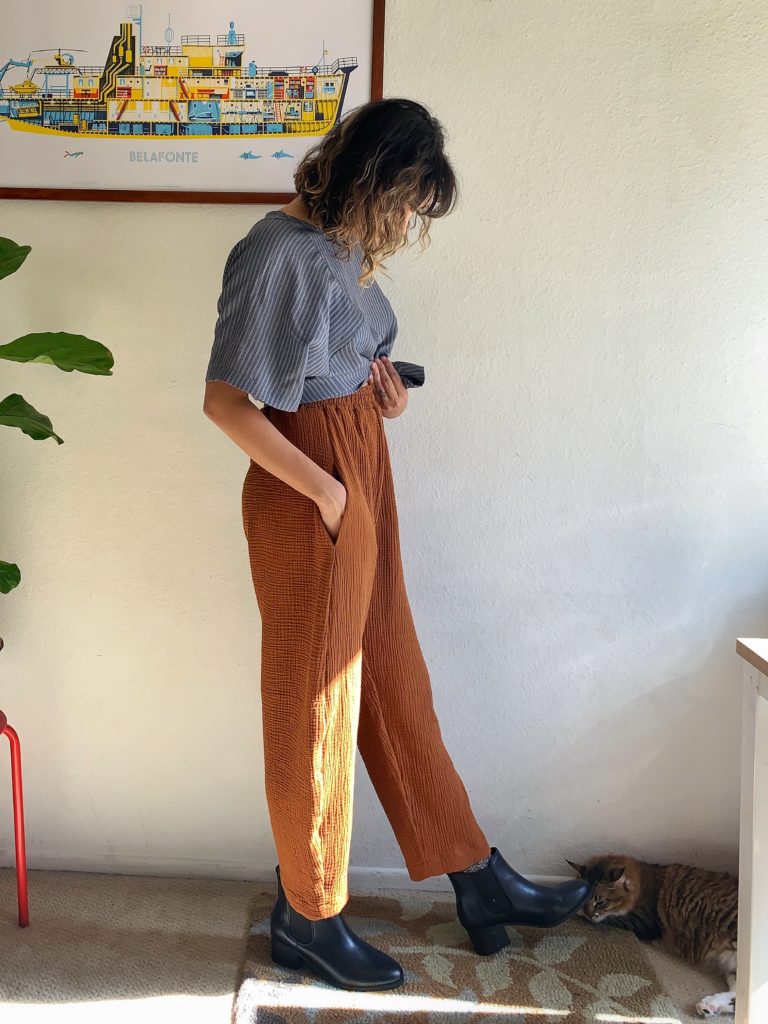
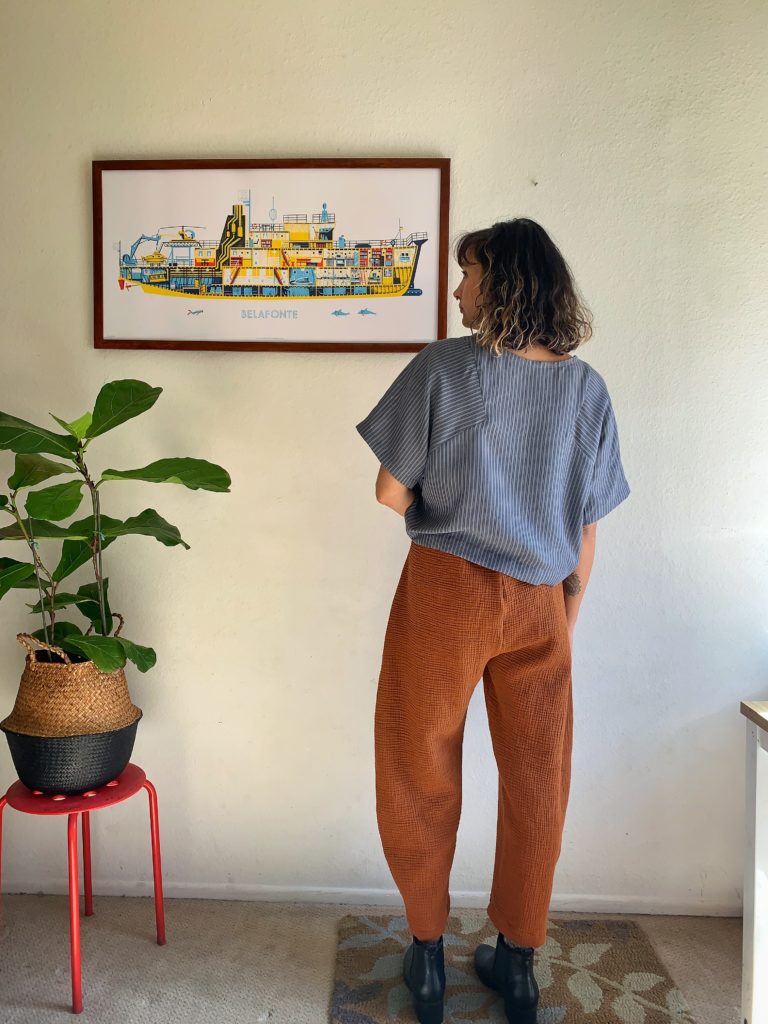
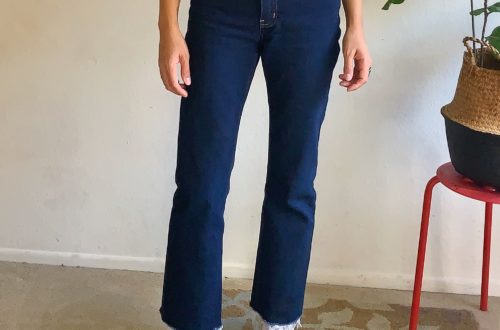
The Bob Woven Pant is such a different shape than any other pants I’ve made. The legs have a balloon shape while the hips sit a bit more narrow in comparison. This gives the Bob Pants a super interesting silhouette. I purchased the pdf pattern from the Syle Arc Etsy store and printed out a size 10 based on my waist measurment. These pants are simple and, especially with an elastic waist, comfortable enough to lounge around in.
Size
I chose to sew the Bob Pants in a size 10 based on my waist size. My hip measurement put me closer to an 8 than a 10, but I like some volume in my pants so I went with the size up and I love the fit. I am 5’8″ and these sit rather cropped on me.
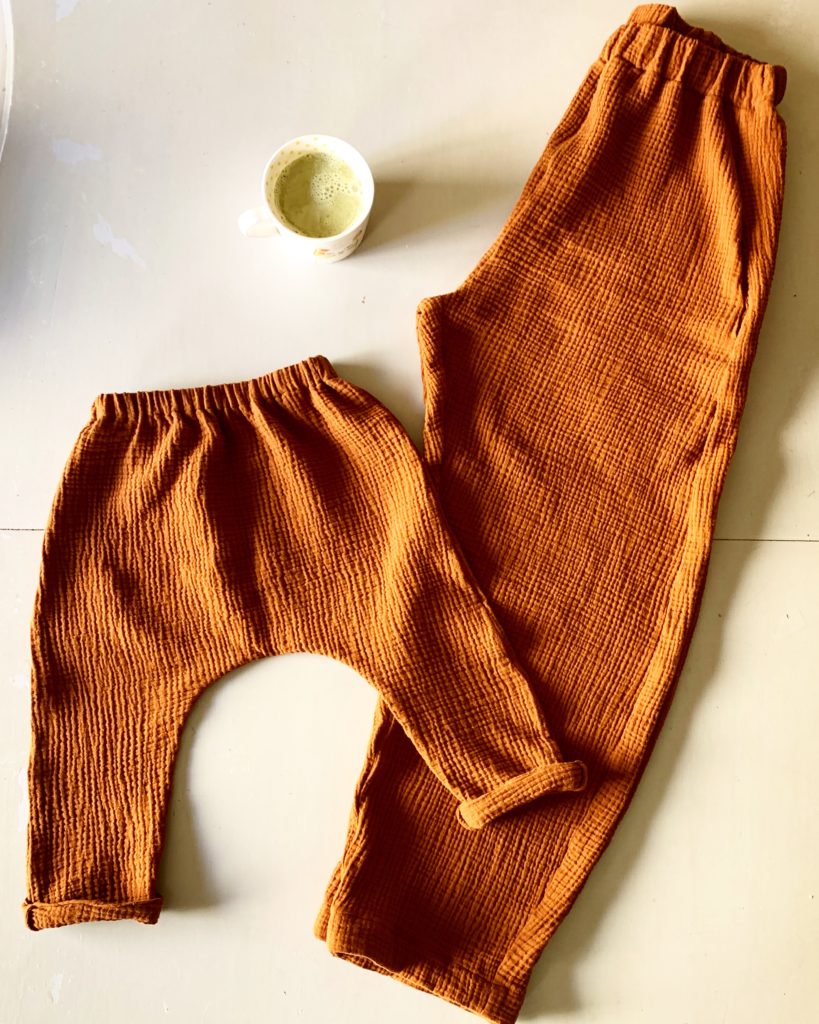
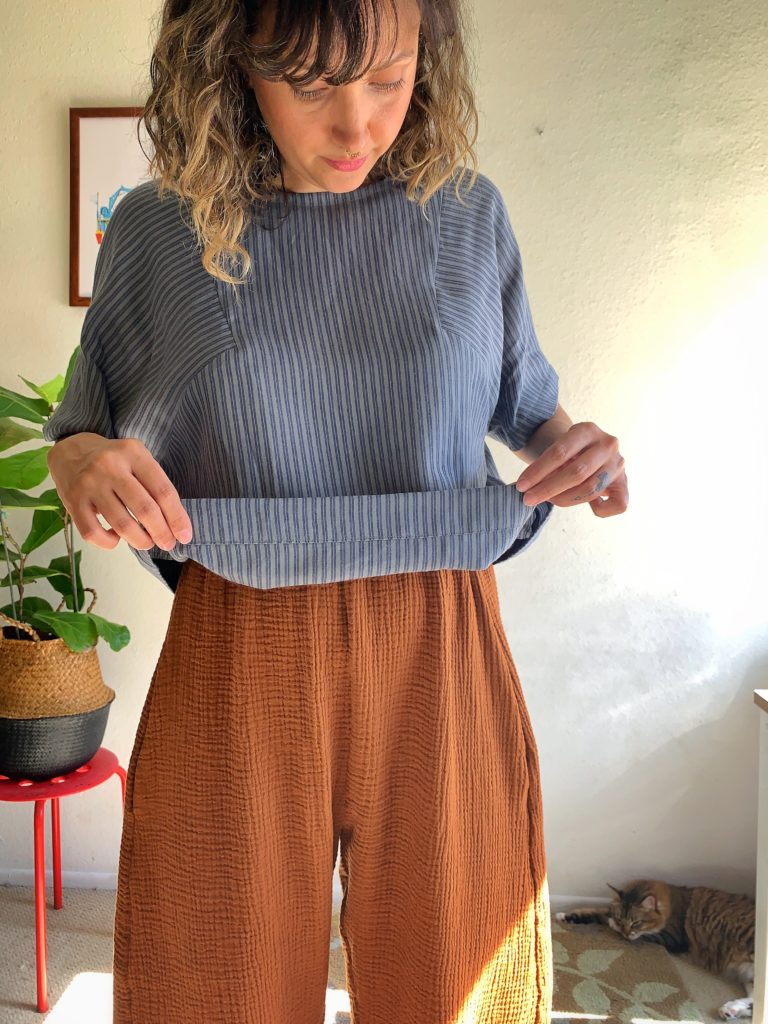
Rather than lengthen the pattern pieces I instead drafted a little facing for the hems using the bottom of the front and back pattern pieces. This way I didn’t have to fully hem my pants and only took a 1/2″ seam allowance when attaching the facings.

Construction
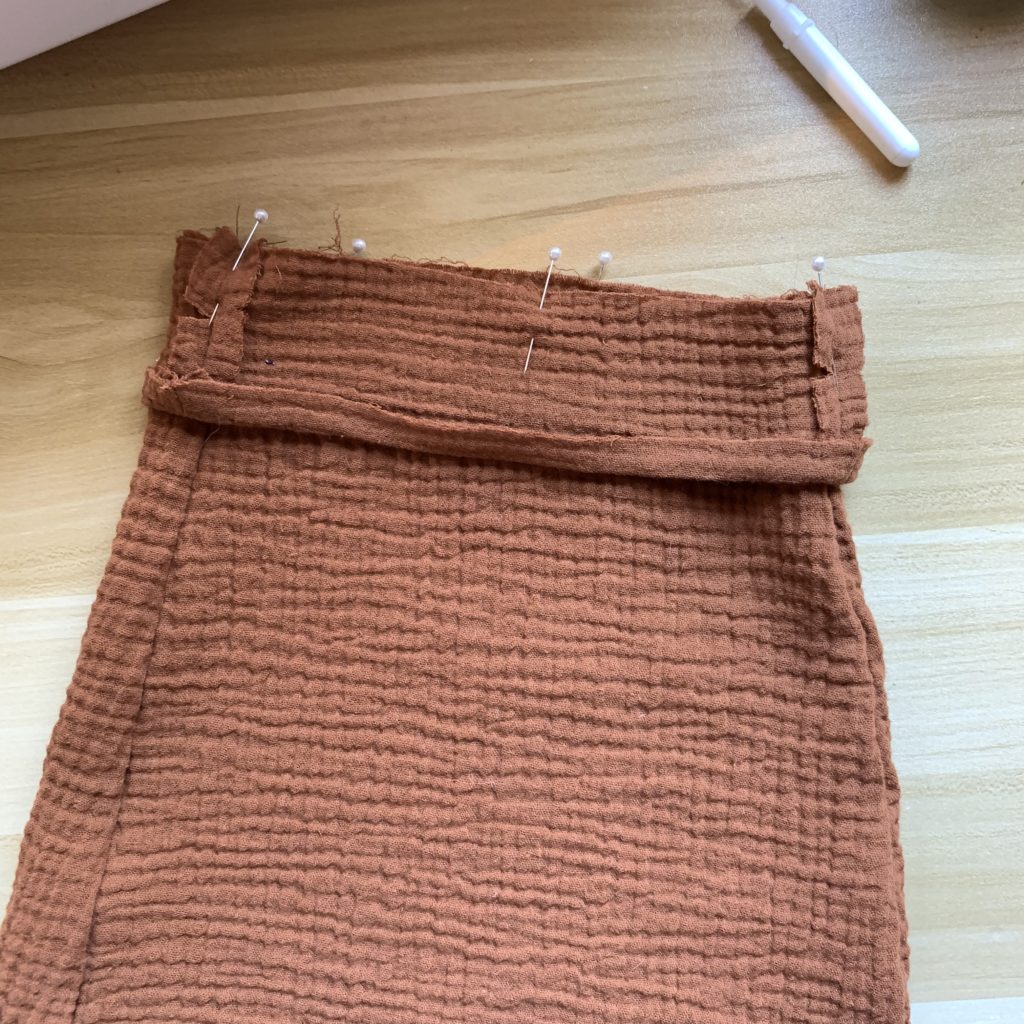
Constructing the Bob Pants is super simple. I used my favorite method for attaching the inseam pockets found in the Lisa Dress pattern by Tessuti, posted about here. I also cut the waistband in two pieces since I needed enough leftovers to make my little guy a pair of matching pants. Other than the facings I drafted to finish the hems mentioned above, and a lot of finger pressing of this delicious double gauze, this is a very straight forward, beginner friendly, pattern.
It should be stated here that I chose not to follow the directions much at all. Anyone who has experience with Style Arc patterns knows that they are fairly sparse. I decided to just skim them and along with following my preferred instructions for attaching inseam pockets, I did this with the waistband as well. All I did was attach the waistband leaving a small gap at the back, fed my elastic through with the help of a safety pin, and then closed up the hole. I also love adding two rows of narrow zig zag stitching along the length of the waistband and in my opinion this compliments the fabric and Bob Pants nicely.
Fabric
The Bob Pants pattern looks cool in this squishy, textured, cotton double gauze from Blackbird Fabrics. Every time I order from this online store I am not disappointed. This fabric has a great drape and heaviness to it making the perfect base for very comfortable secret pajamas. The interesting shape of the drafting of the Bob Pants pattern is apparent in this fabric. I opted to not over press this fabric.
As with almost all fabrics I prewashed with cold water and tumble dried on low upon receiving it. Before cutting I very lightly pressed it with my iron but opted to used a lot of finger pressing during construction as to not disrupt the lovely puckering of the fabric.
Paper Theory Kabuki Tee
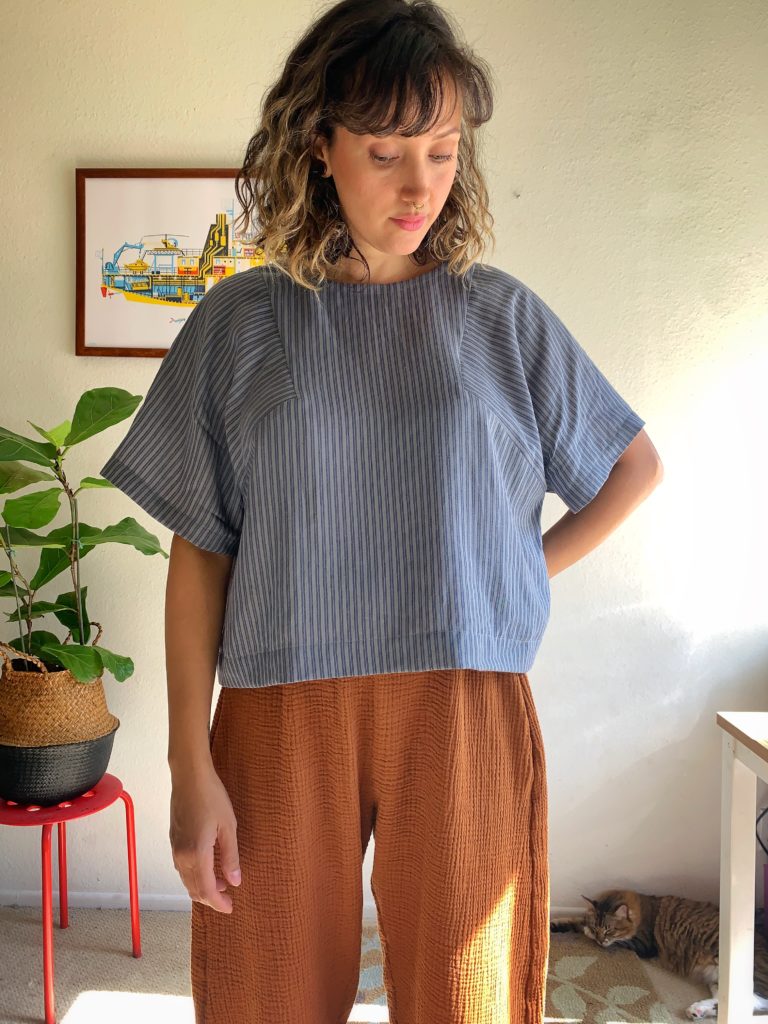
Paper theory has done it again. This is my very first Kabuki Tee even though I have been stalking the pattern for quite some time now. The design at it’s core is simply a boxy woven tee. I already own a few of those. Yet, the Kabuki Tee still manages to be so unique with its tricky little angular armholes and wide sleeve openings. This tee is simple enough for everyday wear and easy to style.
Size
My measurements put me between a size 12 and 14. This time I decided to size down since I understood that the finished fit of the Kabuki Tee would be oversized. I sewed up a straight size 12 and made no alterations to the pattern pieces.
Construction
The Kabuki Tee pattern is relatively simple to construct. I used a 3 thread overlock stitch on my serger to finish the edges together. Sewing the angular armholes does require a bit of fiddling at the corners. I spent some time at each corner moving things around, making sure everything was nice and straight. The pattern instructions suggest clipping into corners while sewing which felt slightly awkward to me and required some maneuvering of my snips. Tricky aspects such as these add to the fulfillment in the end for me and I enjoyed this sew.
I did decide to slightly crop my tee by giving it a very deep hem. I turned the bottom edge under at 1.5″ and again at 1.5″, raising it a total of 3″.
Fabric
The fabric used was thrifted and is possibly a cotton/rayon blend. It feels and presses like a rayon, but is slightly more stable and has a slight sheen. The stripes compliment the Kabuki Tee quite nicely. I cut all of the pattern pieces along the grainline as directed on the pattern pieces and the stripes add to the interesting lines in this tee.
Final Thoughts
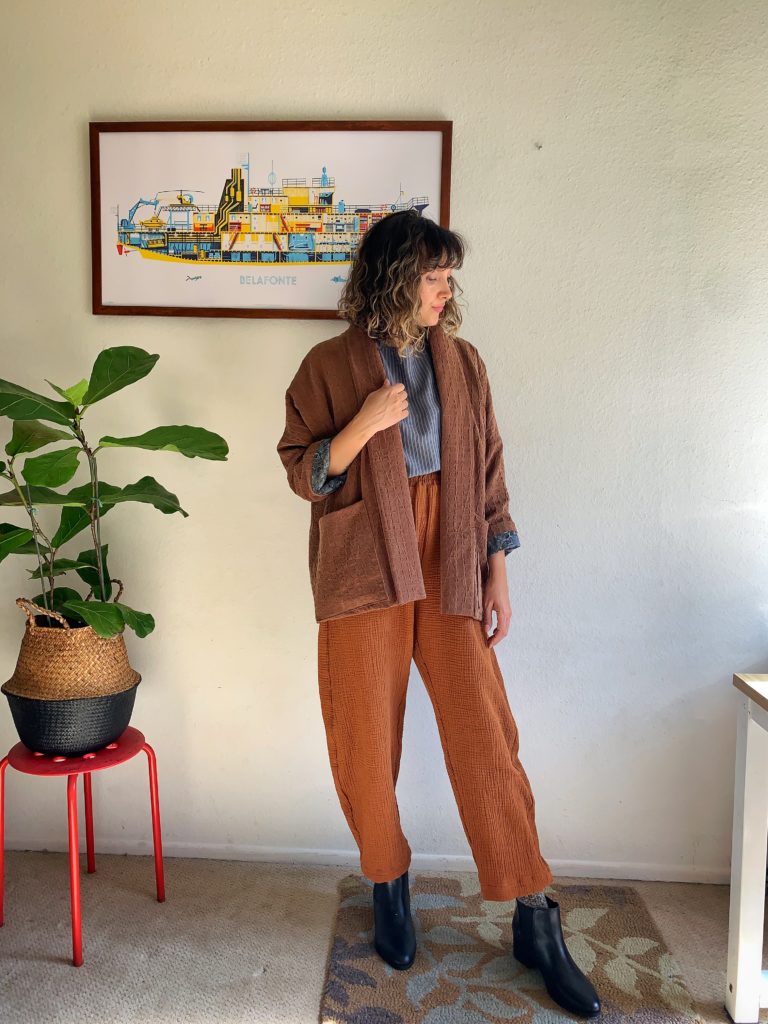
The fact that these two pieces were finished at approximately the same time ended up being such a happy event. Both finished garments are great separates for mixing and matching and will definitely get lots of wear, yet I think they compliment each other marvelously which was a great surprise. Not only do the Kabuki Tee and Bob Pants make versatile wardrobe staples, but I find them to be the product of such beautiful pattern drafting. They have the kind of details that make my mind extremely happy and I feel so comfortable wearing them. Kudos to Paper Theory and Style Arc for their amazing contributions to the indie pattern community.


7 Comments
Carly
This is was such a great & helpful read! I cannot wait to make both of these pieces. Love the idea of “secret pajamas”.
Angie Hook
Thanks so much for reading! Believe me, I love the idea of secret pajamas, too!
Mary Crowe
I just bought the tee pattern! I’m excited to make it, and will be consulting this post while doing so. Thank you for sharing!
Angie Hook
Always happy to help! Thanks for reading!
myrthe
Do you catch the elastic in the zigzag you mentioned or on either side of the elastic?
Joanne
Thanks for this thorough review. I just got the Bob pants pattern and was looking at the instructions thinking ‘is there an easier way?’ I have used the method you described for jersey pants before so I think I’ll do the same.
And I love your outfit! The colours look fab on you. And I love how the pants look slim from the side and more Volumous from the front.
Karen
When attaching the waistband, did you cut it down to the same diameter of the top of the pants? I tried to attach it as the pattern instructs but gave up on that! Trying to decide if I’m going to lengthen the top of the pants and turn down to create a casing instead. What’s your opinion?