
Athina Top Hack
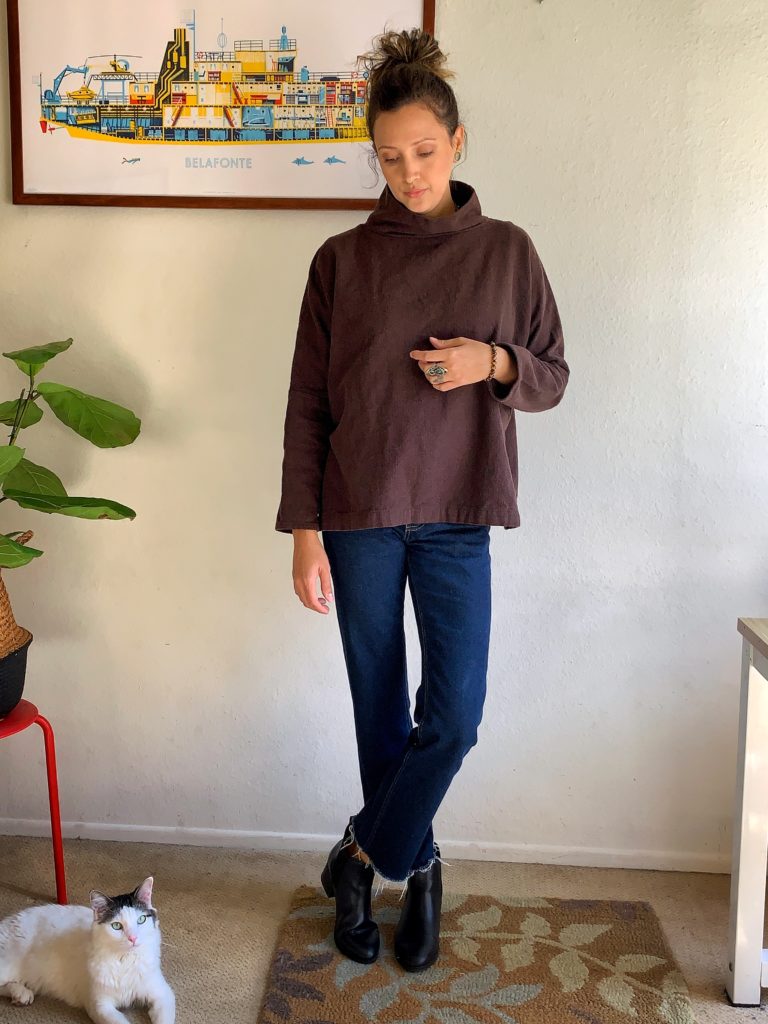
The wonderful Australian pattern maker, Tessuti, offers a free pattern that has become a tried-and-true for many sewists in the community. It is the Athina Top pattern and I hacked it to make the cozy layering piece of my dreams.
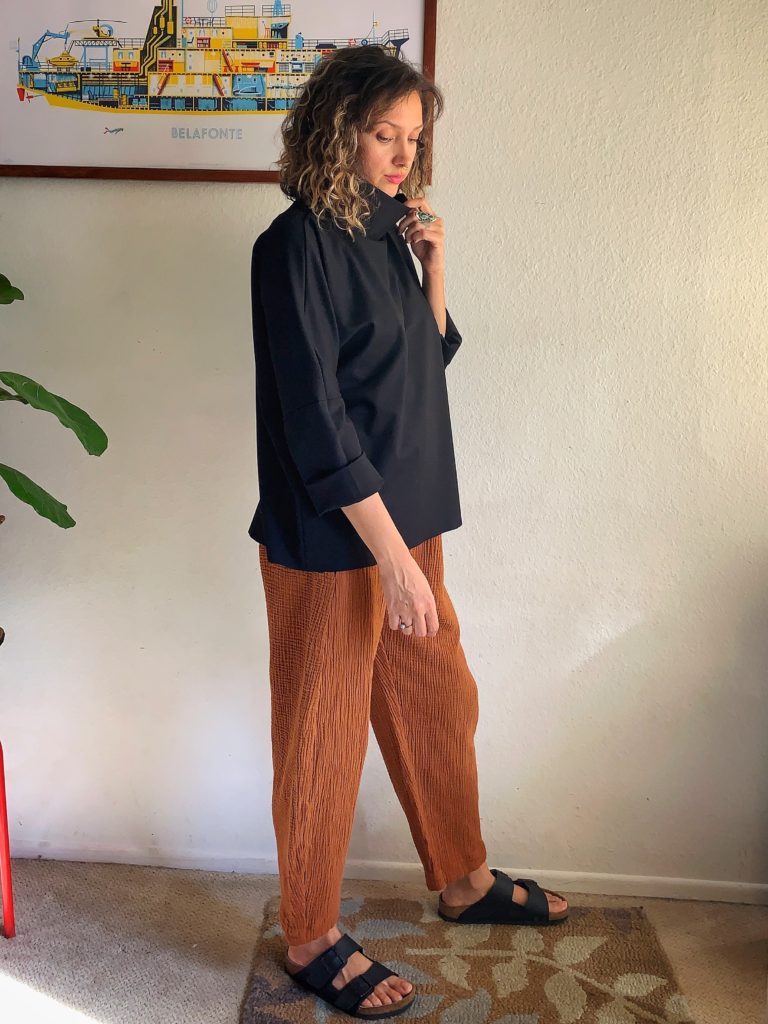
The Athina Top is a boxy woven tee with long sleeves and two options for length in the body. I love the longer, almost tunic, length version of this pattern. It would look lovely in a lightweight semi-sheer fabric as shown in one of Tessuti’s samples.
This hack was really simple to do. I am sure many sewers out there would have no trouble figuring this out on their own, but I also know how nice it is when some of the guess work is taken out of a pattern hack for you. So here goes…
The Hack
We were about to go on a trip to central Kansas. Boy does it get cold there, and being a southern California girl, my closet is really lacking in warm layering pieces.
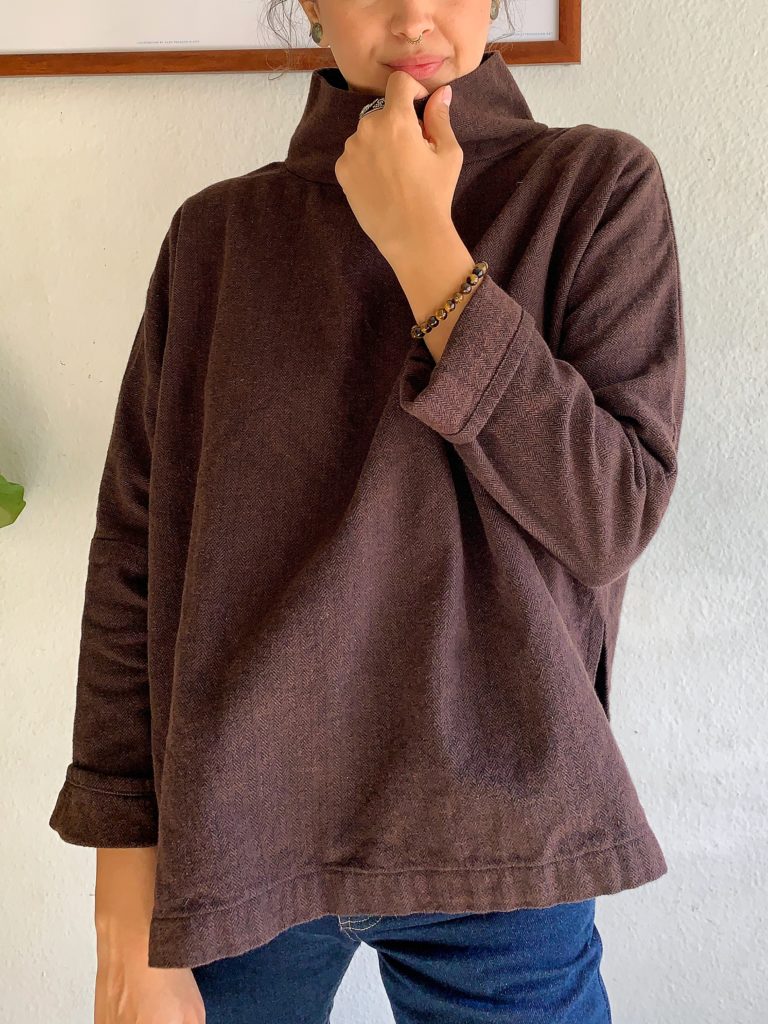
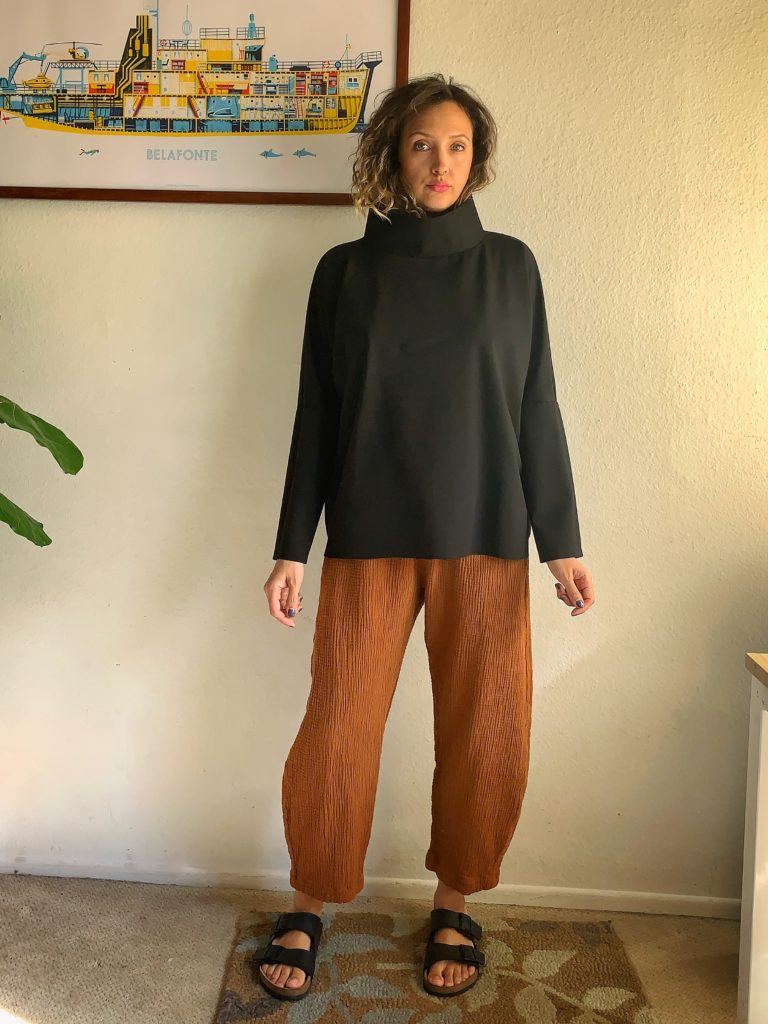
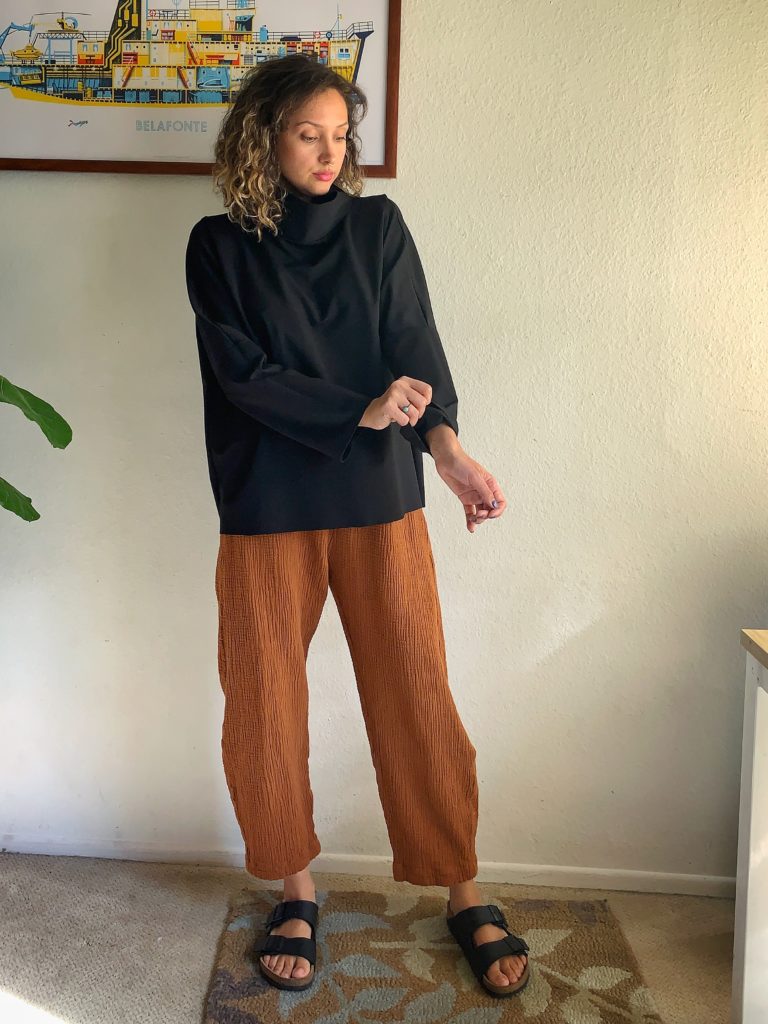
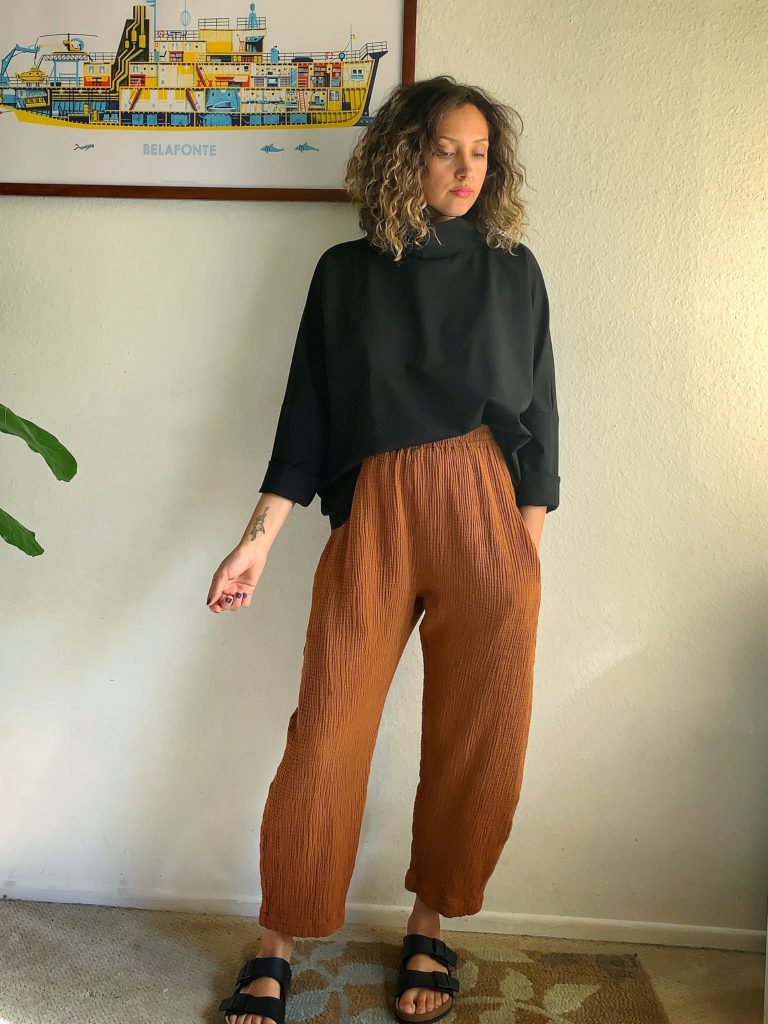
I decided to make two versions of this top, one in a pretty black and brown herringbone flannel from Joann, and one in a black ponte knit. The top I was envisioning had some heft to it to protect from that midwest wind.
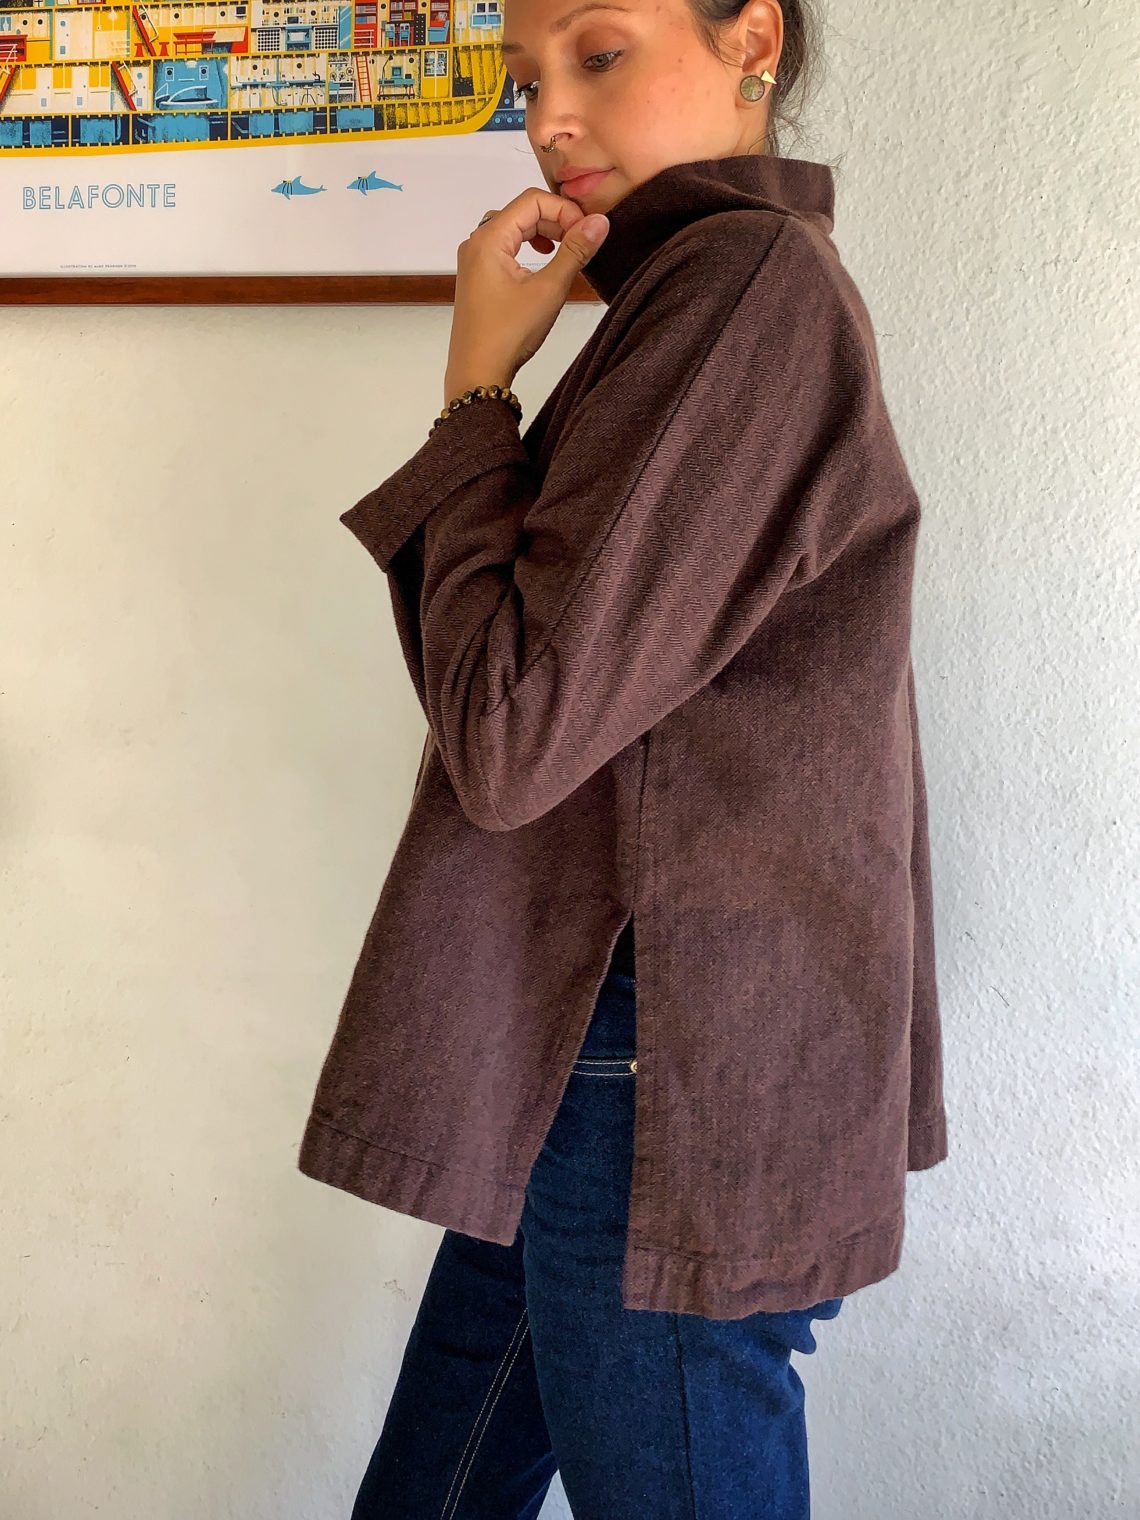
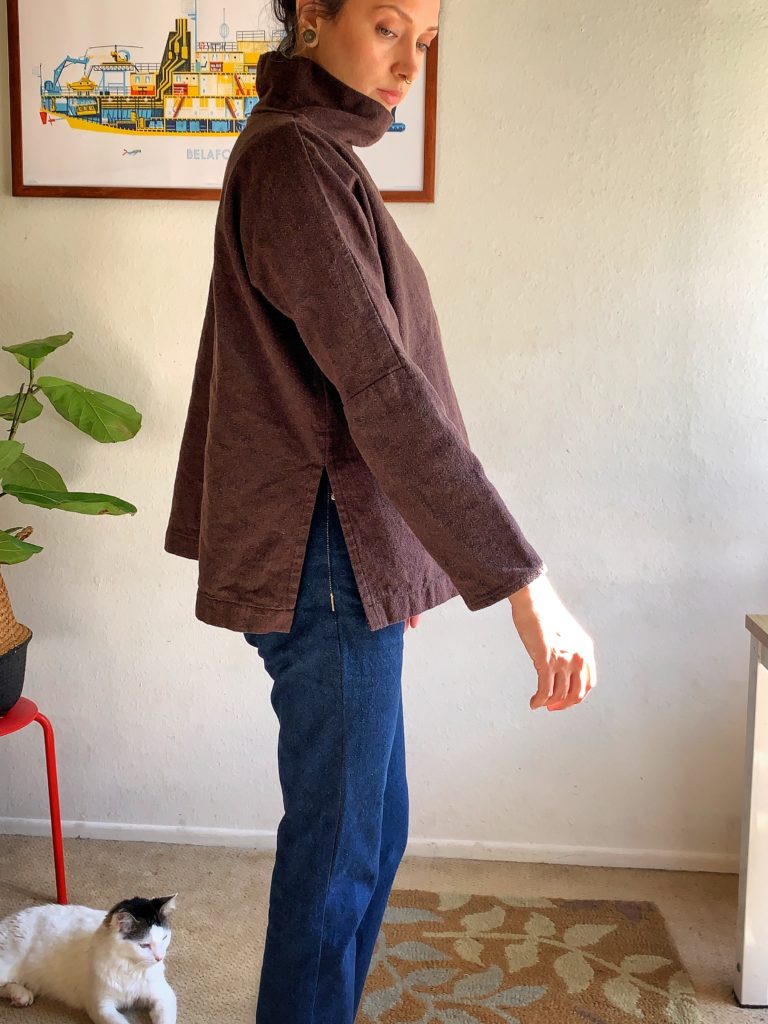
The squishy flannel version is made up in the shorter length and has a tall split hem. The ponte version is cropped slightly shorter than the shortest length included in the pattern by about 3 inches.
Altering the Pattern Neckline
I skipped tracing and cut the pattern out in my size. I went with a size small, deciding to size down one size based on what I had heard from other sewists in the sewing community.
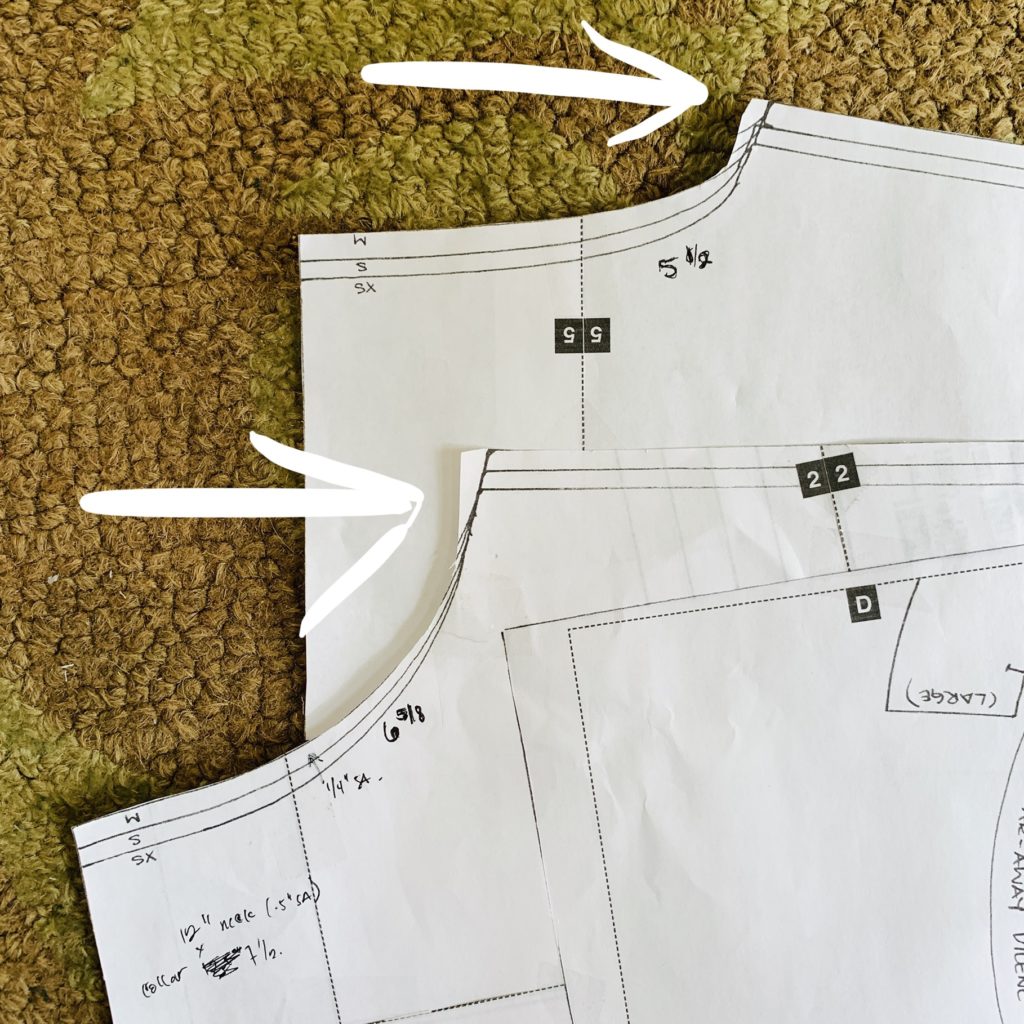
Important! When cutting around the neckline of the pattern, I simply extended the shoulder seam inward bringing the sides of the neckline in by 1/4″ on the front and back pattern pieces. I hoped that this would give the finished neckline more of a rounder shape to accommodate the collar.
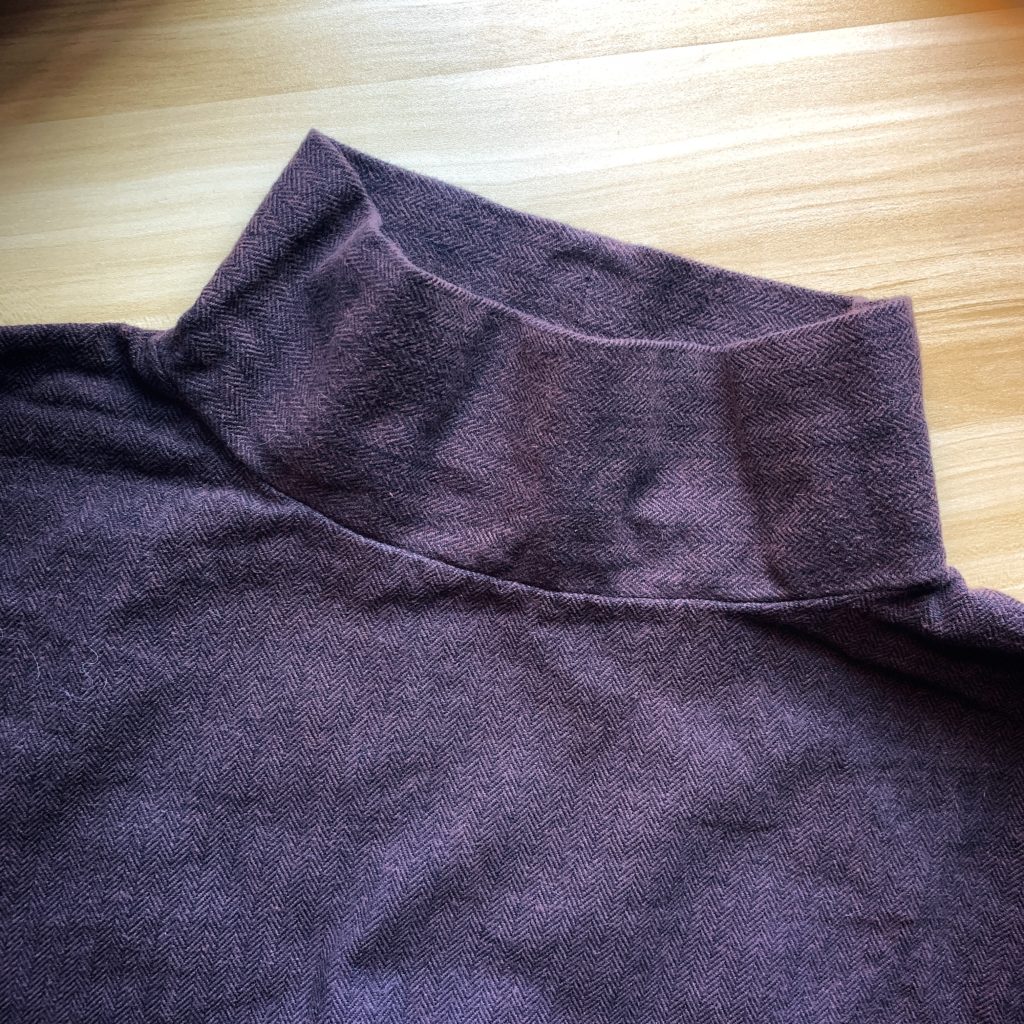
Drafting a Collar
Most importantly, the collar needed to fit over my head. I also knew I wanted to sew this in two different fabric types, woven and knit, and wanted to use the same size collar for both versions. The pattern measurements of the neckline after altering (measured along the 1/4” seam allowance, and not including the shoulder seam allowance) are 6 3/8” on the front piece and 5 1/2” on the back.
I cut the collar on the fold measuring 12” wide by 7.5” long including seam allowance. So that would be a total width of 24” for the collar, sewn using 1/2” seam allowance, finishing with a collar that is 23” in circumference.
The finished collar is slightly smaller than the neckline but that was not a problem at all as I was able to easily stretch/ease the collars in both versions to fit.
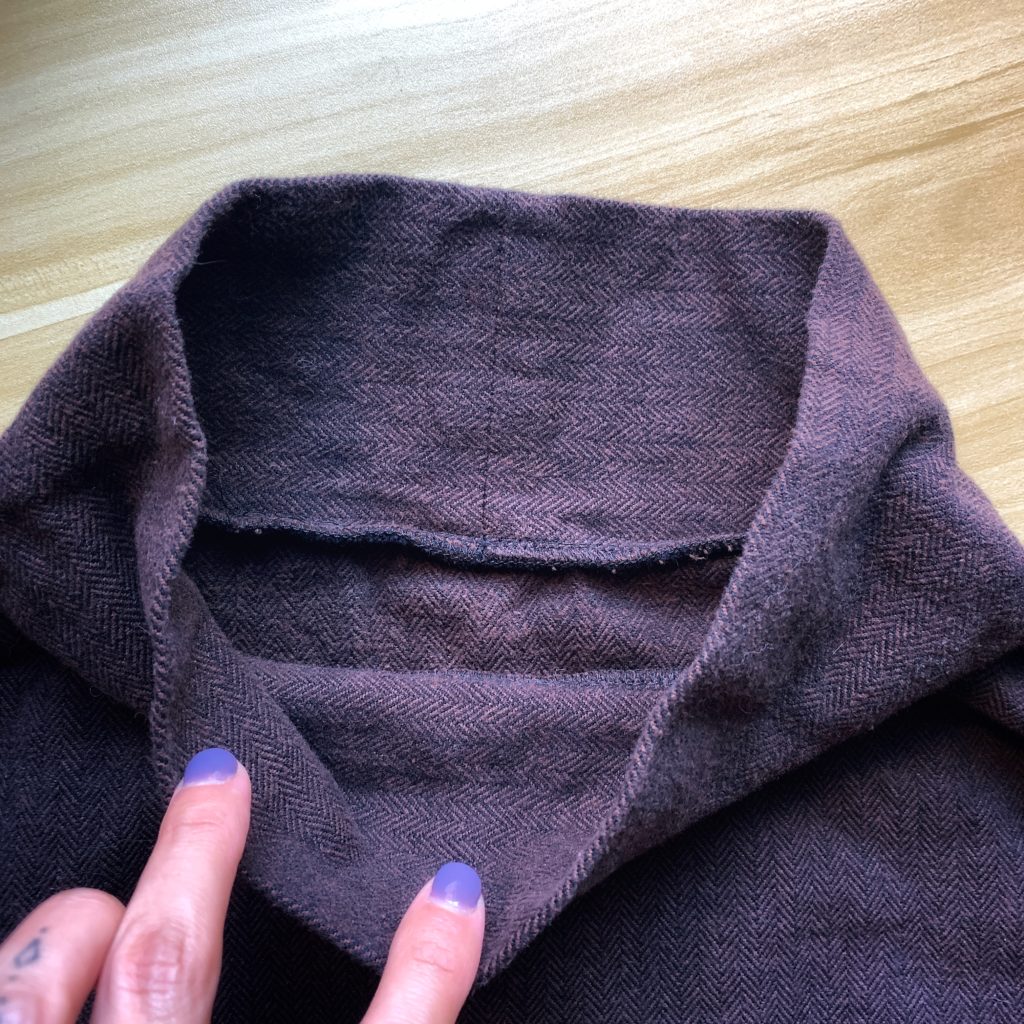
Attaching the Collar
I only included a 1/4” seam allowance for attaching the collar to the neckline since that’s how the pattern was drafted originally.
Therefore, after the short ends of the collar are sewn together, it is then folded wrong-sides-together lengthwise and the raw edges of the collar are sewn to the neckline of the top with right sides facing. So easy. For reference, the finished height of the collar after folded and attached is 3.5”.
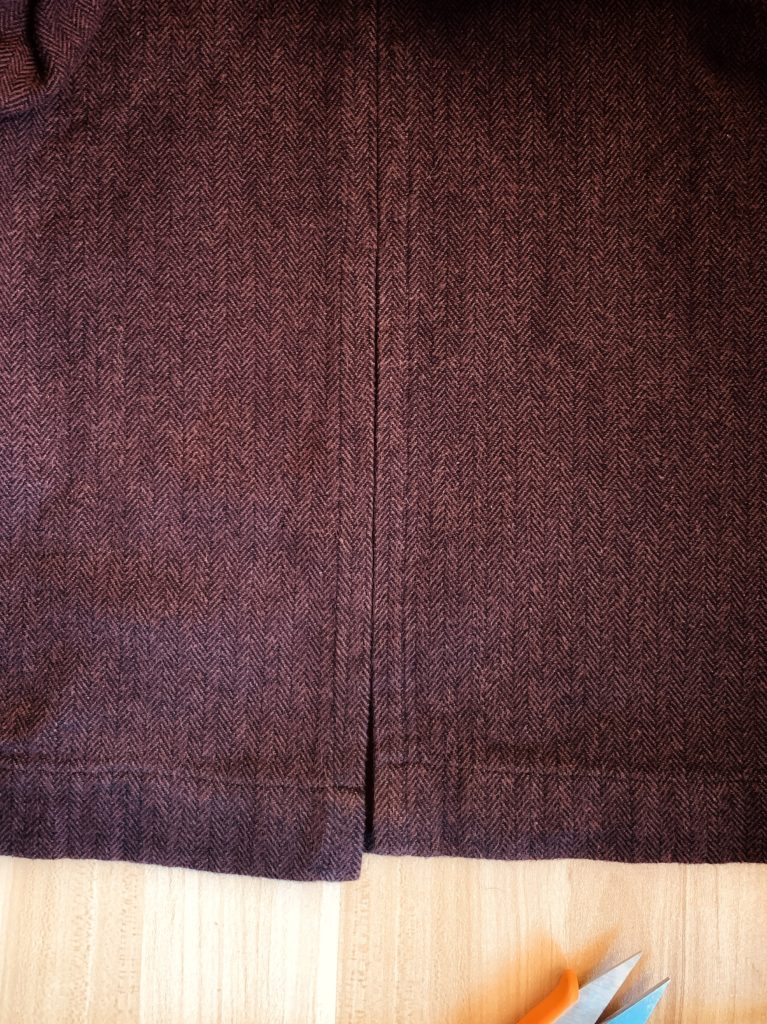
The Split Hem
The split hem is a really sweet feature of this hack, in my opinion. It helps with adding some movement to the my flannel version. I wanted the split to begin at around my waist as I imagined it would be cute worn over high waisted jeans or layered over other tops.
The split on my version begins around 10 3/8” from the hem. I finished all of the seams separately before sewing down to the point I was happy with, making sure to backtack.
After pressing the seams open I sewed around the opening in the side seams, pivoting to sew across the side seam at 1.5” above the beginning of split.
I gave the front a slightly deeper hem than the back by pressing the front hem to the inside at about 7/8” and then again at 1 1/4”. The back hem was pressed 3/8” to the inside and then again at 1 1/4”. This created just a slight variation in lengths between the front and back. It’s the little things, right?
Note: I know a lot of my measurements seem arbitrary and needlessly complex but I honestly will often start pressing hems at what looks right before measuring.
More Hems
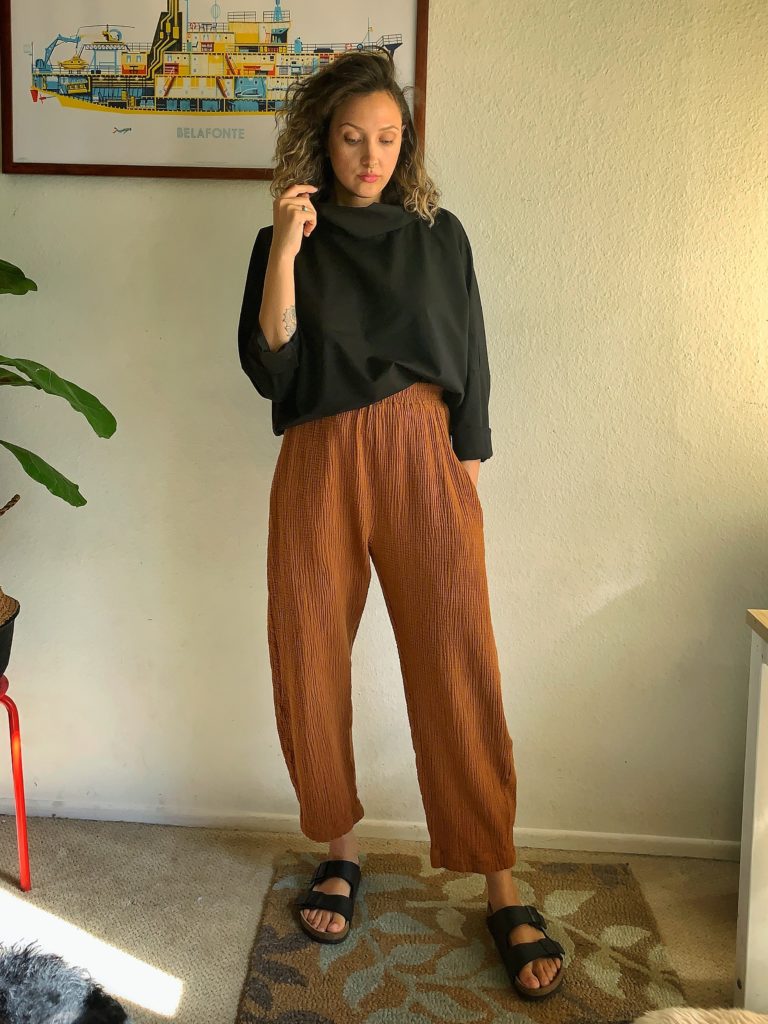
Call it laziness but I chose not to hem the ponte version. The fabric doesn’t fray at all, so I left the edge raw. I did hem the sleeves by turning once to the inside at 5/8” and topstitching in place using the lightning bolt stitch on my machine.
I paired the ponte version in these photos with my recently completed Bob pants, blogged about here.
Final thoughts
These are so great to have. My flannel version got worn a ton on my trip. It was warm, comfortable, and great for traveling. I think I prefer the feel of this look over a sweatshirt on me. But then again, I don’t own many sweatshirts so I can’t be sure.
I only have one complaint – I think I need some wooly nylon for certain projects. Wooly nylon is a soft and stretchy serger thread that is often used on knit garments with stretch. The dropped shoulder seams on the ponte version are almost too scratchy for me at times. I’m not sure why, and I know I have very sensitive skin, but serger threads can periodically be too scratchy for me on some knit tops. Anyone know why that is? It’s odd, because I don’t think this is an issue with wovens.
I hope this helps anyone interested in making their own Athina Top hack! I’ll definitely be making a collarless version of this pattern soon. Isn’t it cool that patterns like this one are available to us for free to love and enjoy so fully? Feeling grateful. Bye for now!


6 Comments
Linda
I love this! It looks great…..I love turtlenecks in general but especially in our Canadian winters….it would be so cozy in a soft corduroy…..also love your pants, did you make them, and with what pattern?
Angie Hook
Corduroy is such a good idea! I’m wearing the Bob Pant by Style Arc Patterns (blogged) and Megan Nielsen Dawn Jeans. Thanks!!
Cindy
Love love love your Athina hack!! I’m a Southern California girl too… but living in cold New Mexico at the moment… this hack will be fantastic!! I just finished my first Bob pants this morning so I’ll get right on the Atnina! Love all of your posts!!
Angie Hook
I am so happy to hear that, thank you!! <3
Kate
Hi, I love the look of this top and I’m eager to try your hack. (Thanks for explaining for the newbies 😉 Question: It looks like you cut the neck line on the pattern’s medium size. Just wanted to check if that was on purpose to make more space for the added collar? Was the rest of the pattern cut for the small size? Thanks!
Plus Size Swimsuits
At last, I found anarticle thath I am looking for quite a long time.
I hope it will help me .
King regards,
Thomassen Schneider