
A Romantic Archer
Hacking the Grainline Archer Button Up Shirt
I’ve had a couple projects on my mind for quite some time and finally gave myself a little push to sew them up. Sometimes there just isn’t the exact sewing pattern out there for what you want to wear. In those cases getting creative and a little trial and error is a must, but this can also cause me to stall. Taking the time to make something that could potentially end up a sewing fail is a risky business! Luckily I was pretty confident these were going to work out for me. Both of these makes are such lovely additions to my handmade wardrobe.
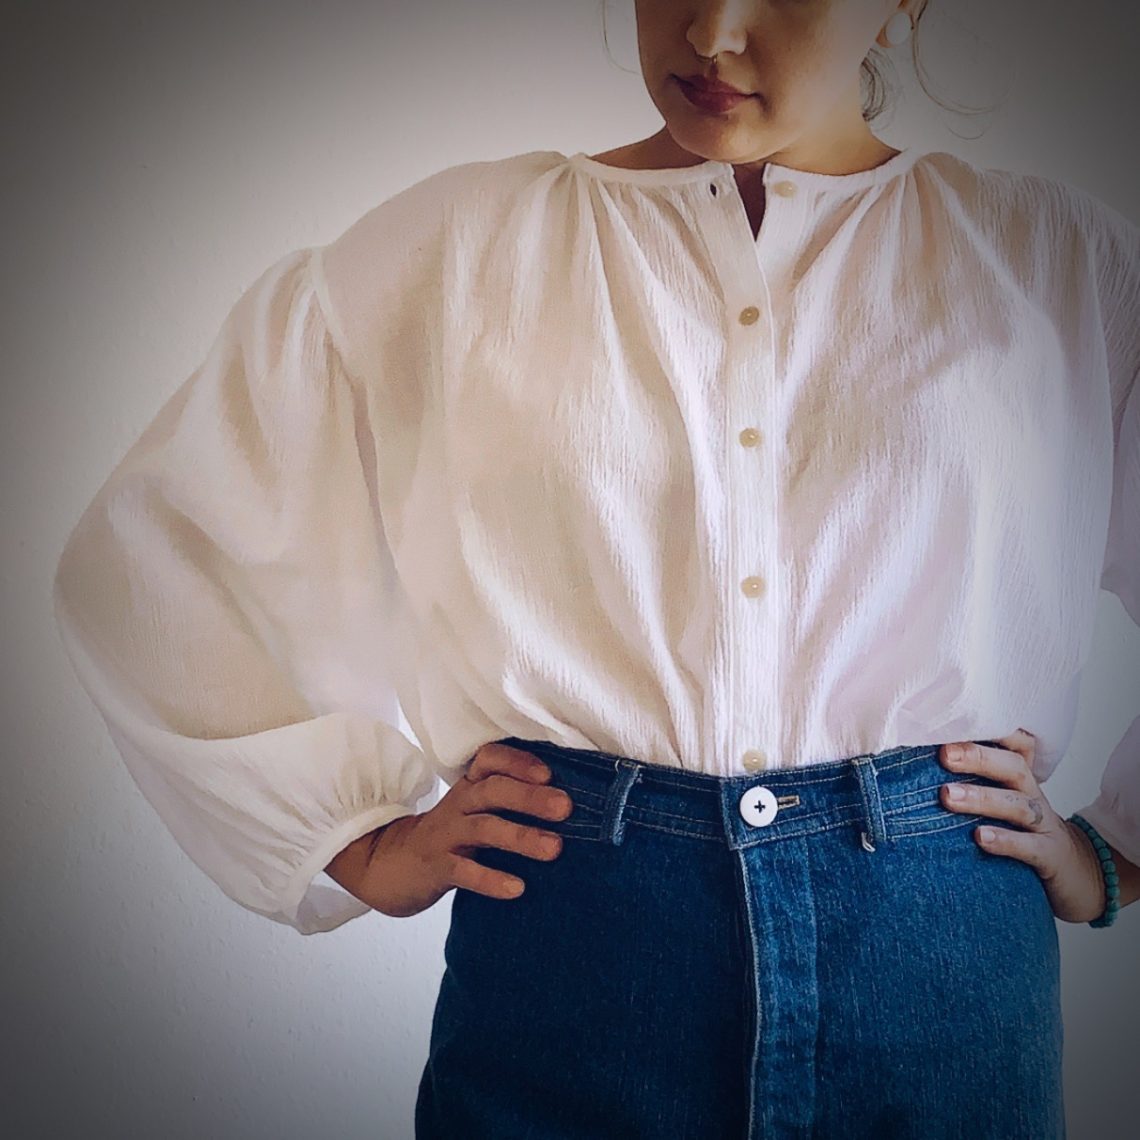
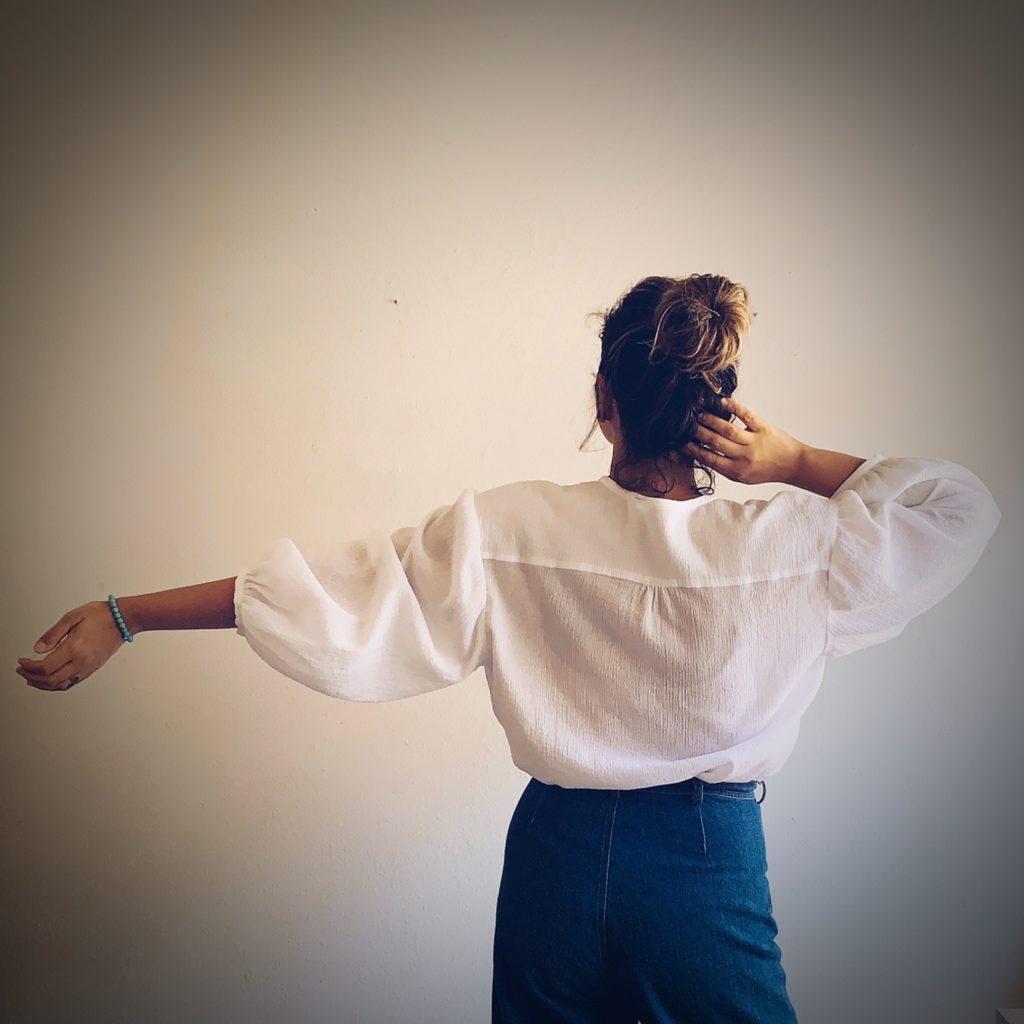
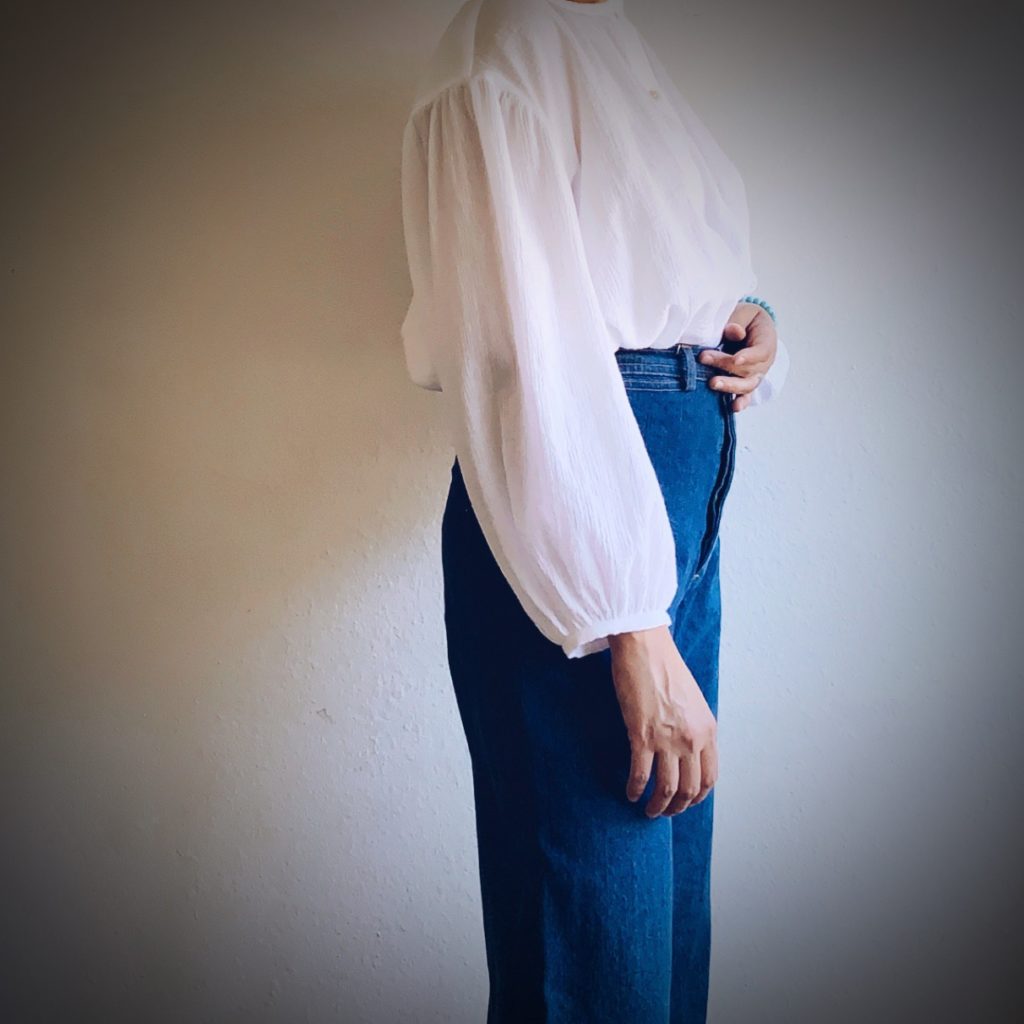
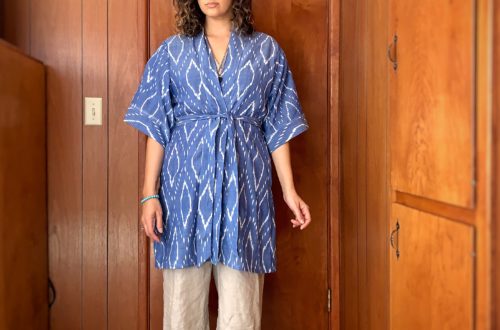
One of those makes is on hold for another post because today is all about my new billowy blouse! Haha! When Aaron saw my drawing of the idea for this shirt he asked me if I was making “the puffy shirt.” Referencing Seinfeld of course, as always. My response was “yes! I am making the puffy shirt, and proud of it!”
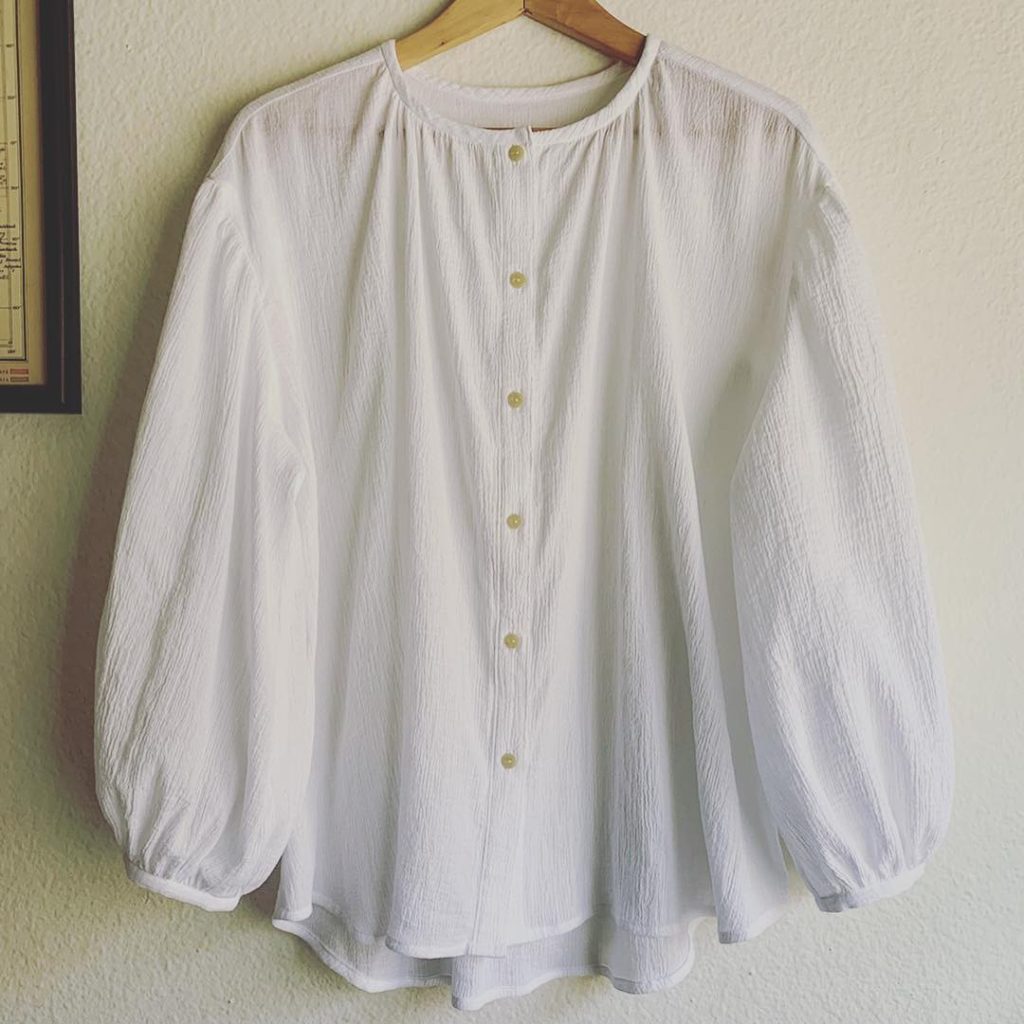
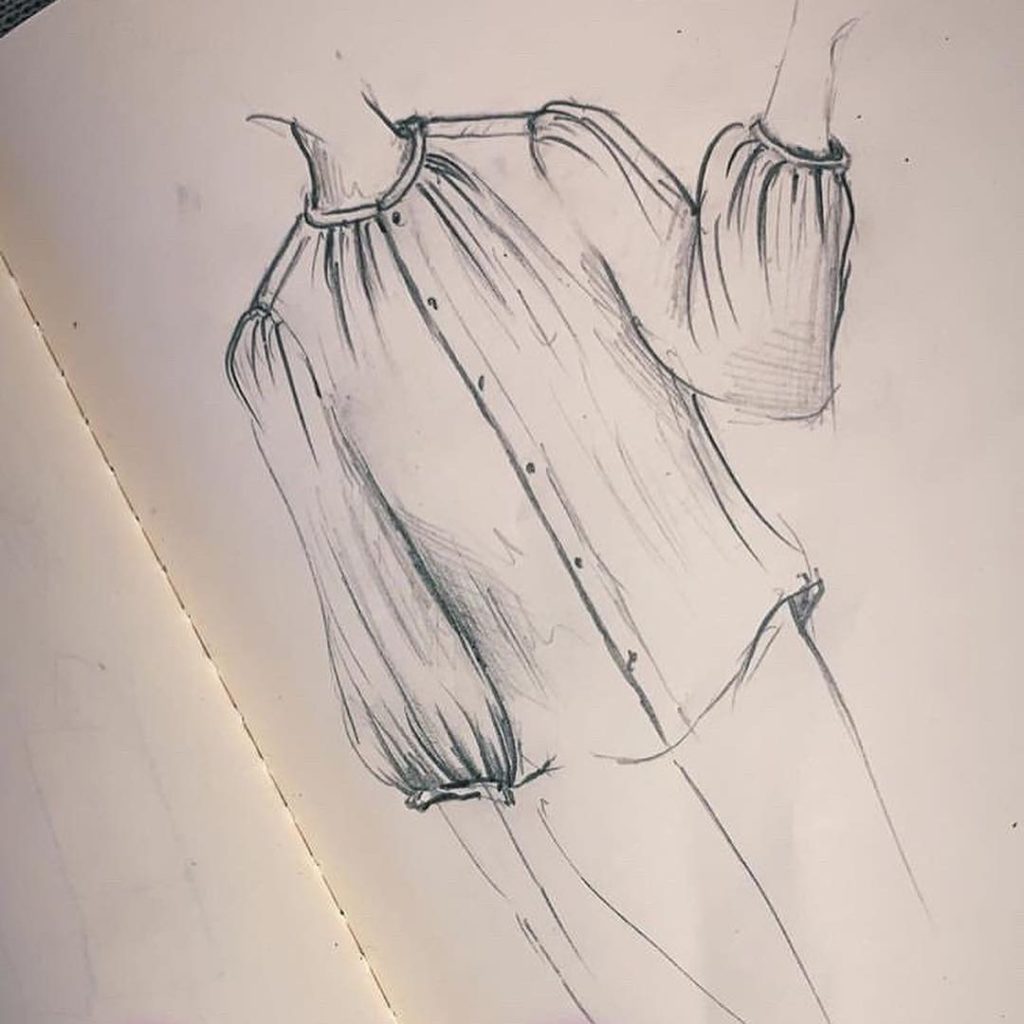
I had purchased this white gauze a while back from Cali Fabrics with vague ideas of a shirt in mind. One thing that I love about doodling ideas is that the modifications needed to get you where you want to go can solidify upon seeing the lines on paper. The ever-popular Archer Button Up by Grainline Studio stood out in my mind as a good base for what I needed. However, getting from A to B became very clear after taking a moment to draw it out.
Let me walk you through what I did:
There are 3 main changes to the pattern:
- Add width to the front pieces that would allow for gathers around the front neckline.
- Add width to sleeves.
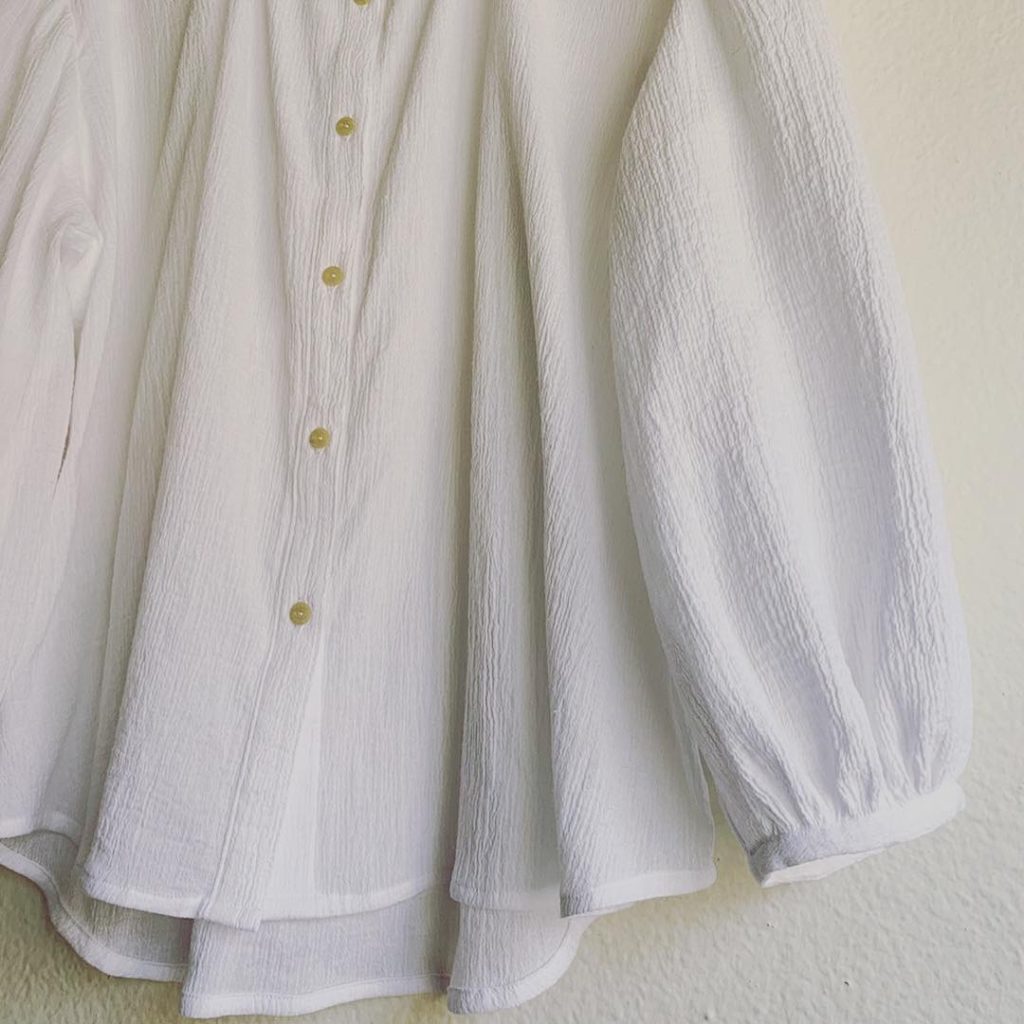
- Swapping out cuffs and collar stand for double fold bias tape.
For my last Archer I sized up to make a flannel shirt. I knew that I wanted a roomy fit with this one as well so I went with the same size. What I didn’t account for was how much this gauze would grow. This explains that slightly drop shouldered look, which I actually really like so we’ll call that a happy accident!
Changes to the pattern pieces…
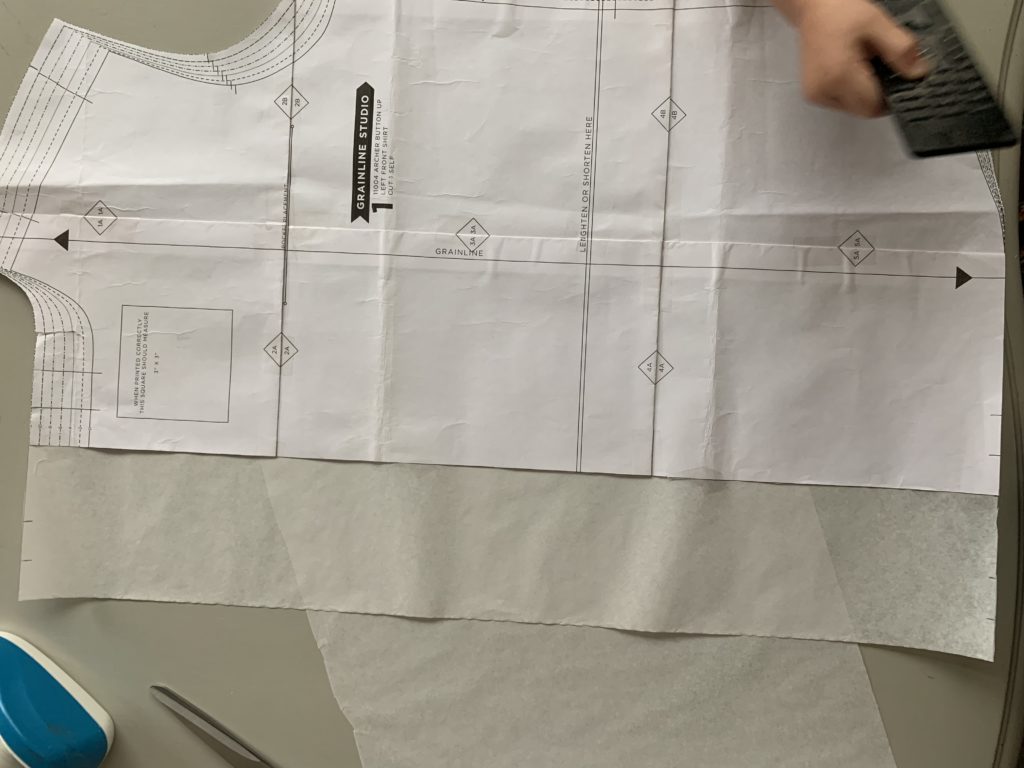
I added 4 inches to the center front of both front pieces.
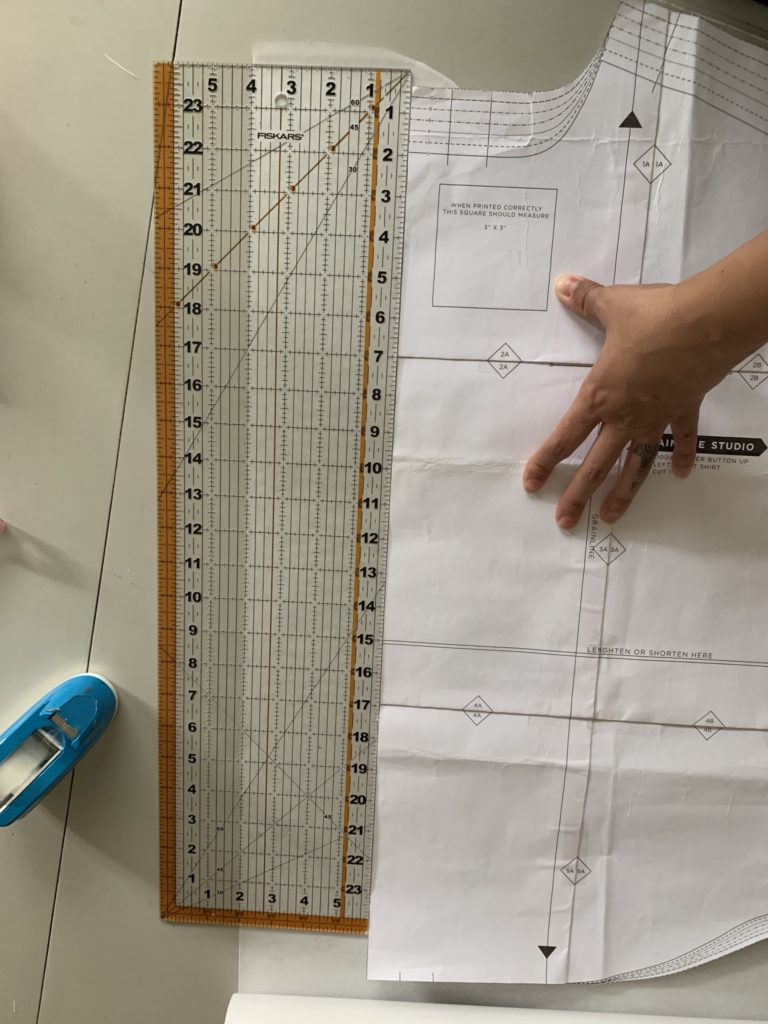
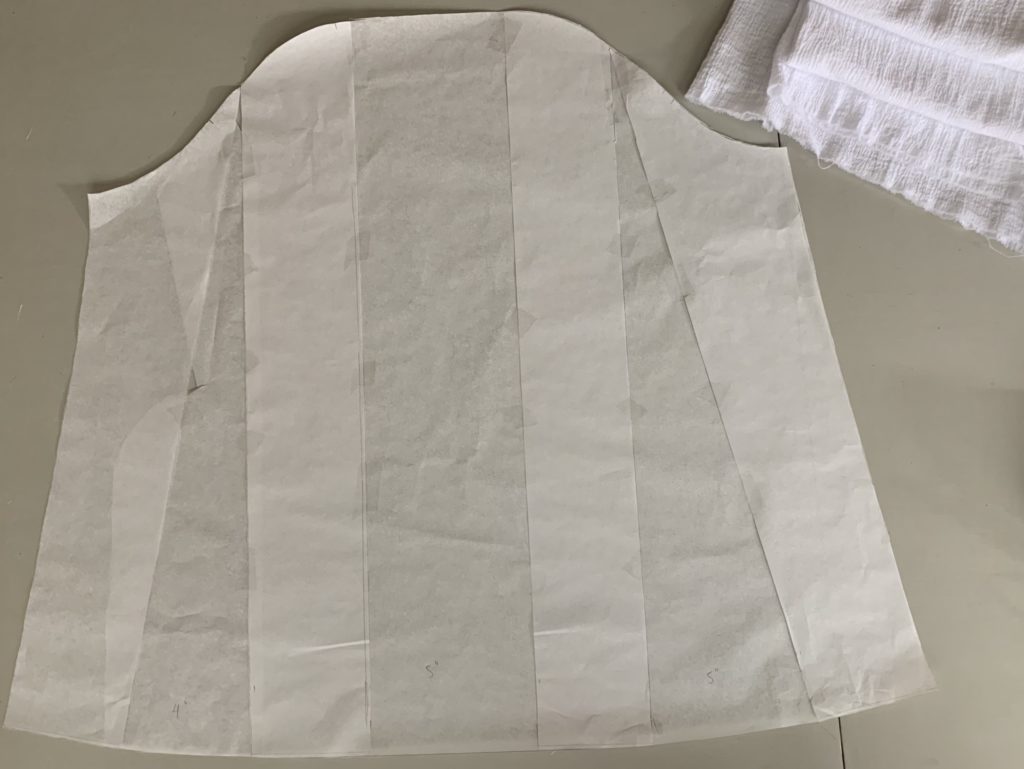
After tracing my sleeve onto tracing paper, I drew three vertical lines at an equal distance apart. Then I slashed it vertically through the center of the sleeve along the grainline all the way through and added 5 inches to the center width.
Next, leaving a hinge at the top and using the slash and spread method I added 4” to the bottom of the sleeve at the line at the front of the sleeve and 5” to the bottom of the sleeve at the line at the back of the sleeve.
Cutting my fabric…
Fabric was cut using the new front and sleeve pattern pieces omitting the collar, collar stand and sleeve cuff pieces. The back piece, yoke pieces, and placket were cut as normal.
I cut 2” wide bias strips from my fabric.
Sewing the shirt…
I followed the instructions for constructing the shirt as normal but opted to add gathers to the area where the box pleat would go on the back shirt piece. This gauze wasn’t responding well to topstitching on the yokes so I skipped it.
Sleeves:
Before attaching the sleeves I used two rows of basting stitched to gather the now wider sleeve caps between the notches included in the pattern. This pattern uses 1/2” seam allowances. I usually sew one line of gathering stitches within the seam allowance and one right outside the seam allowance (which is later removed) to help with even gathering. I just eyeballed it here and when attaching the sleeve per the instruction I evenly distributed the gathers along the top of the sleeve between the notches.
Prepare the bias binding:
After sewing and finishing the side seams I prepared my bias tape. Press the bias tape in half lengthwise. The outside edges are then pressed toward the center, and then down the center fold again. When folded up your bias binding should measure around 1/2″ wide. Made Everyday has some great info on making your own bias tape.
To finish the sleeve hems:
Cut a piece of bias binding to the length you’d like your sleeve cuff allowing for a small seam allowance. Next the two ends are sewn together to form a loop/cuff. Press the seam open.
Sew gathering stitches to the sleeve hems using the same method previously mentioned.
The sleeve hem is gathered up significantly until it looks about the circumstance of your cuff. The loop and the sleeve hem are pinned right sides together. Evenly distribute the gathers and then sew at a 1/2” seam allowance.
Press the bias tape away from your sleeve. Then fold the bias tape back along the folds created earlier and toward the inside of the garment. Stitch in the ditch to secure the bias tape cuff in place.
To finish the neckline:
After completing the plackets on both sides lightly gather the fabric (again with basting stitches) along the front neckline between the shoulder seam and placket.
Cut the bias tape the same length as the pattern piece for the collar stand. I used that as a guide for even gathers on the front pieces.
Pin the bias carefully around the neckline right sides together ensuring the gathers looked evenly distributed and leaving 1/2″ extending past the placket at both ends.
Sew at a 1/2″ seam allowance. Press the bias away from the garment and remember to then press the 1/2″ ends of the bias tape in before completing the binding. The ends should be hidden inside the binding after stitching in the ditch.
Note: There is likely a more professional way to make some of these modifications but I just went with what felt comfortable. As soon as I started sewing it was all very intuitive and came together nicely.
Final thoughts:
The Grainline Archer is such a wonderful and versatile pattern. I will definitely be making another one of these. Shorter sleeves, maybe right above the elbow, would look cool. And possibly in a cotton lawn or something a bit crisp. The queue just continues to grow and grow like the expanding universe! This style top looks great tucked into high waisted bottoms, like the Persephone Pants pattern worn here which I made last year in denim.
I already have my next post on my mind with more pattern hacking details! Working those pattern hacking muscles is so satisfying! Leave a comment with any thoughts or questions. Talk to you later, friends. <3


7 Comments
Kathleen
I just love this hack (and the Grainline Archer as well). Your blouse has the romantic feel of the Roscoe Blouse, but a little more controlled. Thanks for the excellent instructions. Is your Archer just one size up?
I’ve just discovered your blog and am looking forward to browsing.
Also….. I’m almost a neighbor (at least relative to a garment sewists’ world) here in Ojai…. Fun to see and read another SoCal sewist!
Kathleen
Angie Hook
Yay! The boys and I were just in Ojai at the Painted Pony Farm! I’t so beautiful there in your town, especially this time of year I’d bet. I’m glad to meet you and thanks so much for your support. I did size up one size and I’m glad to hear that you aren’t finding my instructions too difficult to follow. I don’t own the Roscoe pattern yet but could be lovely to have one of those too, I think. 🙂
Cheryle
I really like the changes you made on the shirt. It looks so pretty & comfy to wear.
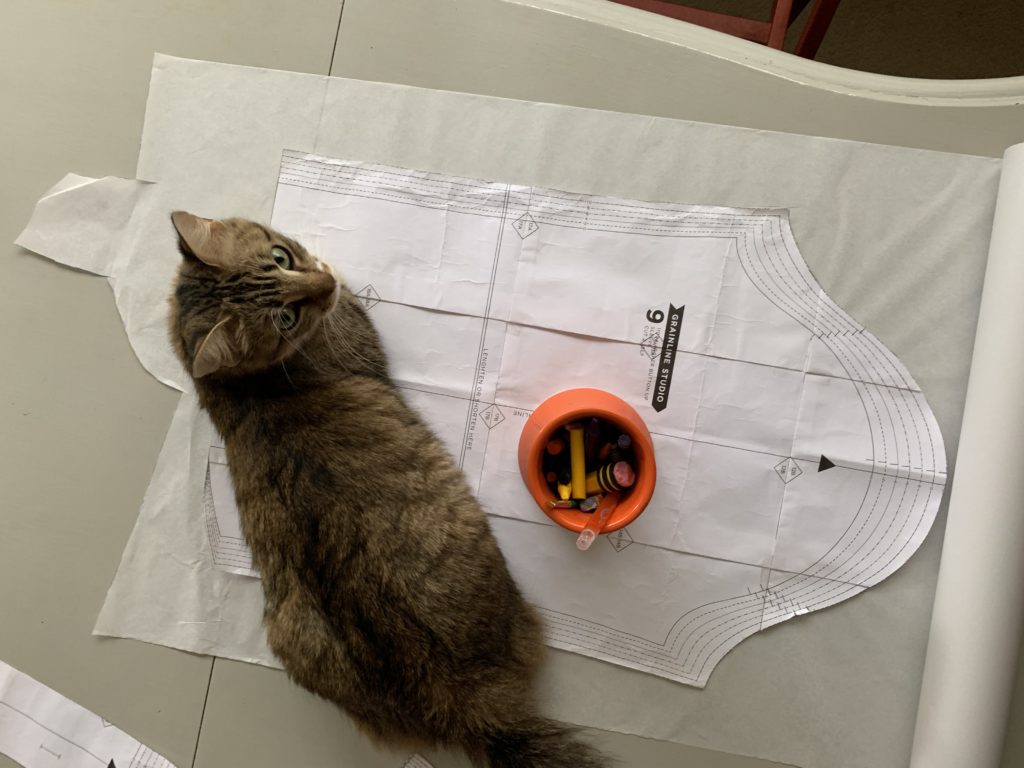
Love your cat pattern weights too!
Angie Hook
?? It’s so comfy! Thank you so much for stopping by, Cheryle. Glad you like it.
Lia
OMG. This is so beautiful. I was reading your blog in a controlled, thoughtful way until I saw the thumbnail for this blouse and thought ‘WHAT IS THAT I WANT IT’! I’m going to have to try this hack when I can fabric shop again!!
Angie Hook
Thank you so much! Hopefully we can all get back to shopping soon. Take care!
Jessica
Beautiful top! Did you make the jeans as well?