
Zadie Jumpsuit Times Two – A Pattern Review
Took me long enough, but finally here is my review of Paper Theory’s new-ish pattern, the Zadie Jumpsuit. All in all it is so much better than I had anticipated. I completed the short sleeved jumpsuit and a wrap top using this pattern as well. It was such a great sew!
Immediately following the patterns release there was a lot of hype within the Instagram sewing community. The styling and timing were really perfect. There had been a few wrap jumpsuits circulating previously, mostly pattern hacks and such. There are tutorials on the Threadsnips and What Katie Sews blogs all about wrap jumpsuits. I had even caught the wrap jumpsuit fever at one point and attempted a hack using a free jumpsuit pattern by In The Folds. The muslin I finished just didn’t feel right and the idea was scrapped.
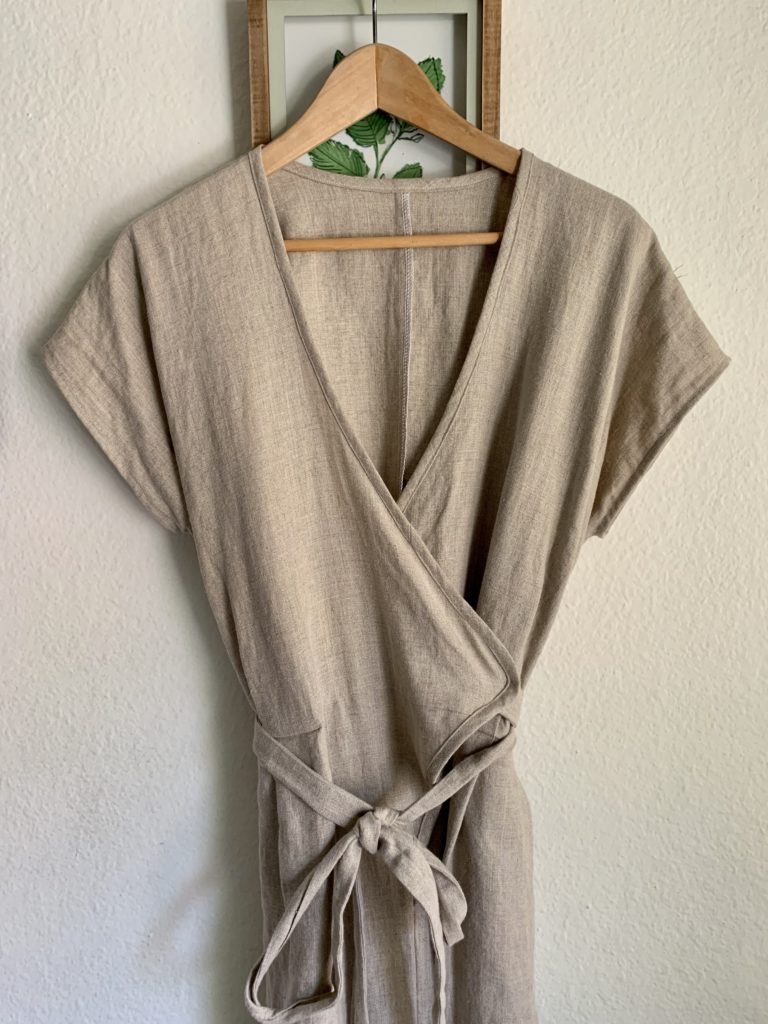
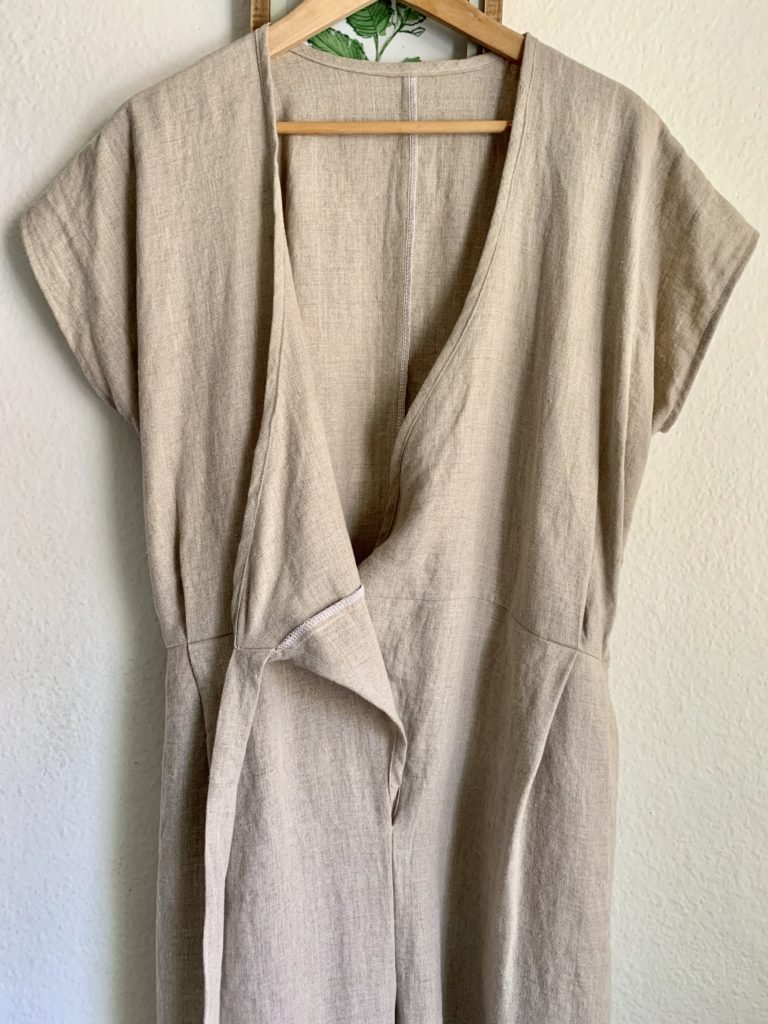
The Zadie pattern is a wrap style jumpsuit with only some small pleats for shaping so it’s really quick to sew. The most complicated step (which wasn’t very) was sewing on the binding and for me required a LOT of pinning and slow stitching, especially on my linen version. I love a challenging sew occasionally but a quick gratifying project like this feels so rewarding. When the end result is as good as this, I can’t say I love any other feeling more.
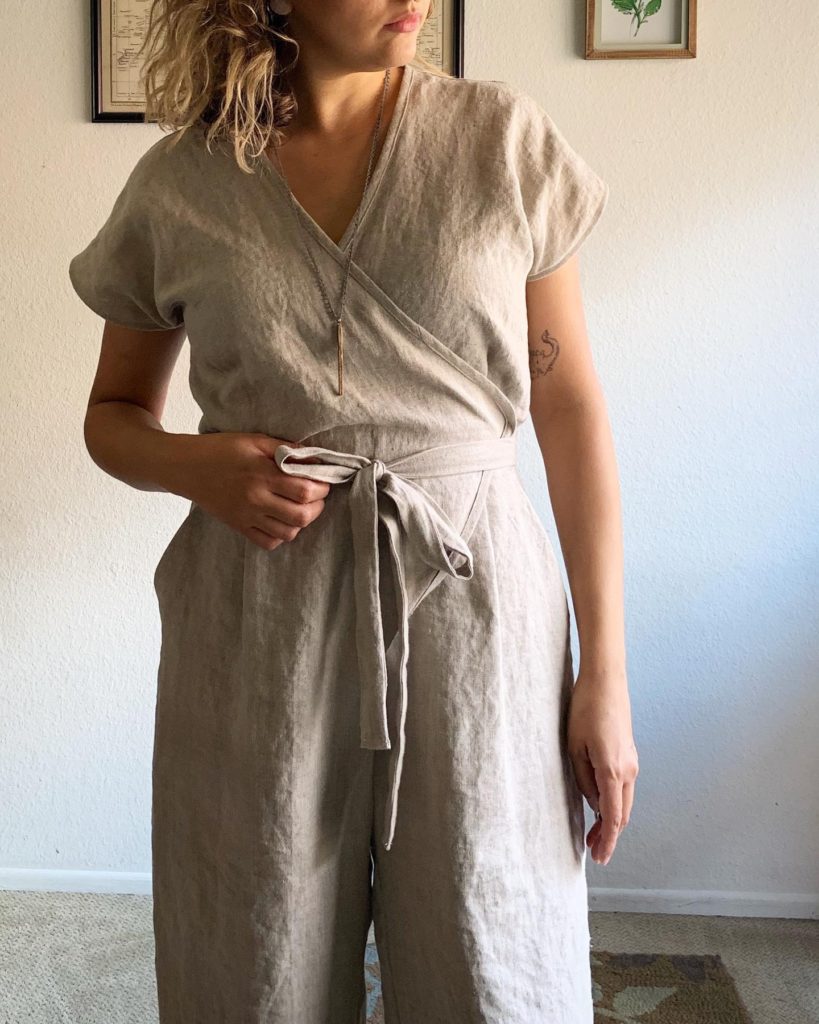
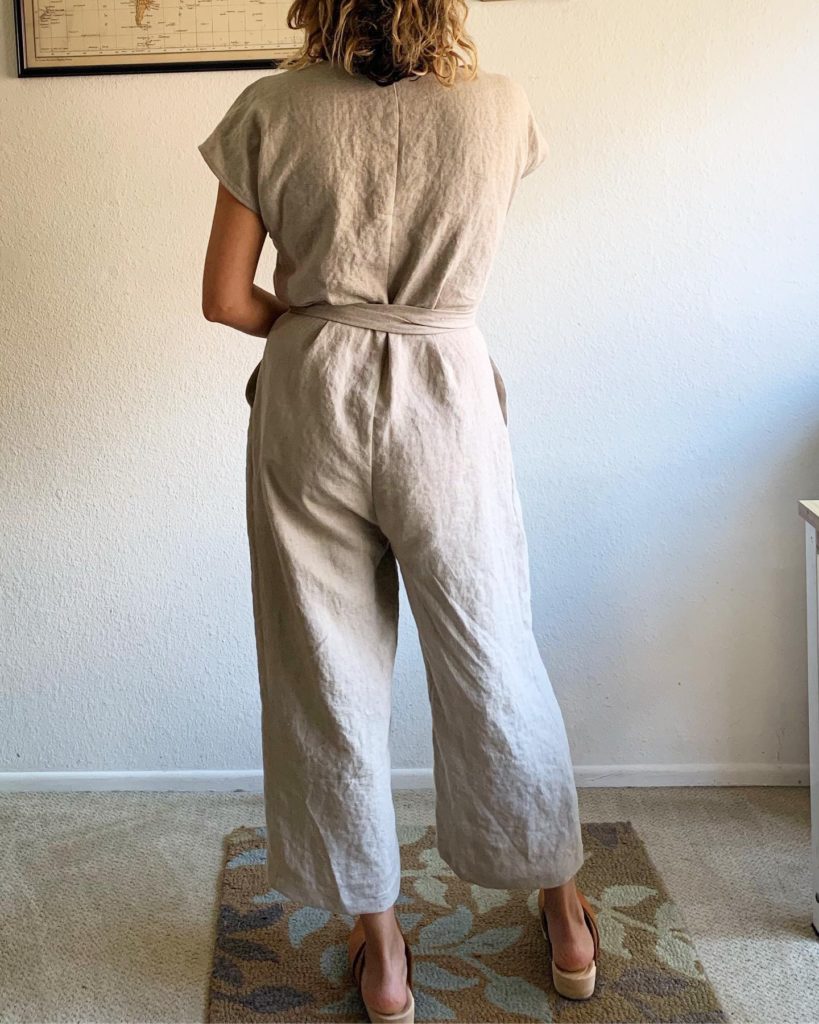
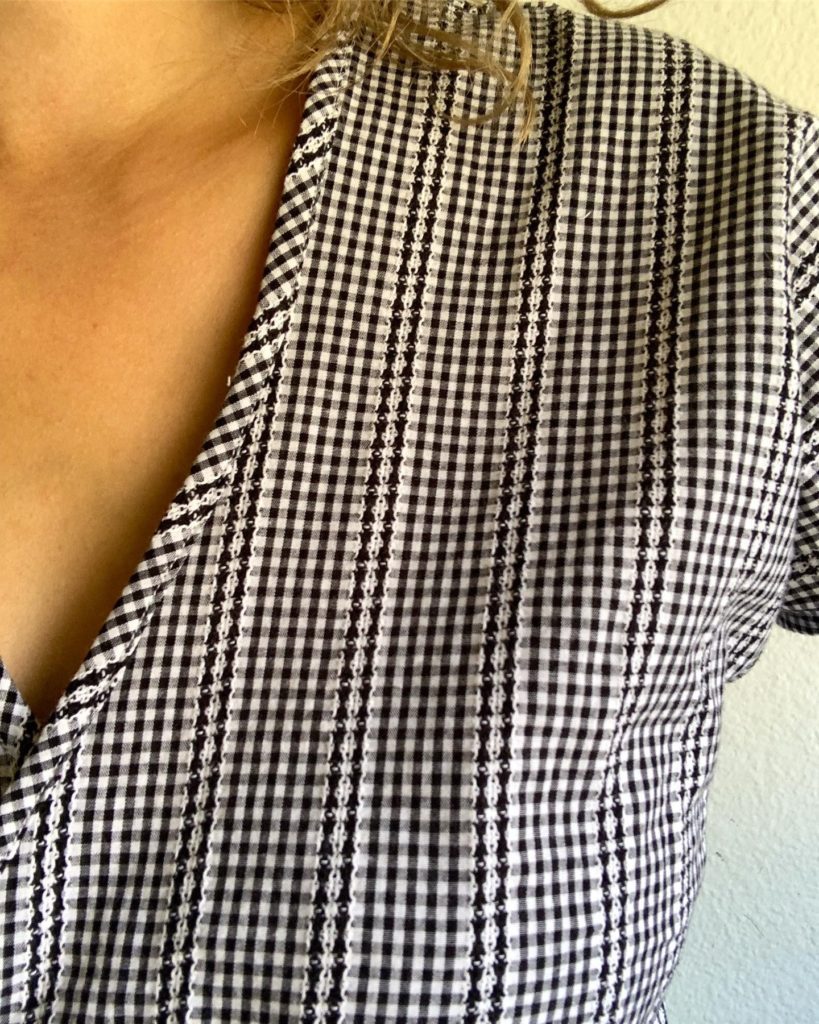
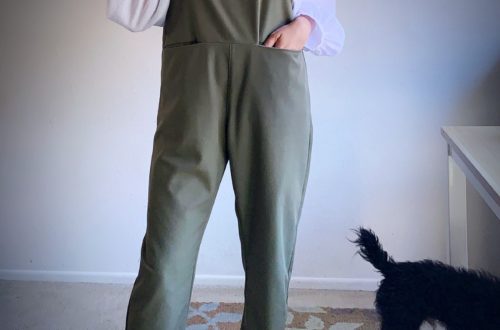
Version 1 – A Linen Zadie Jumpsuit
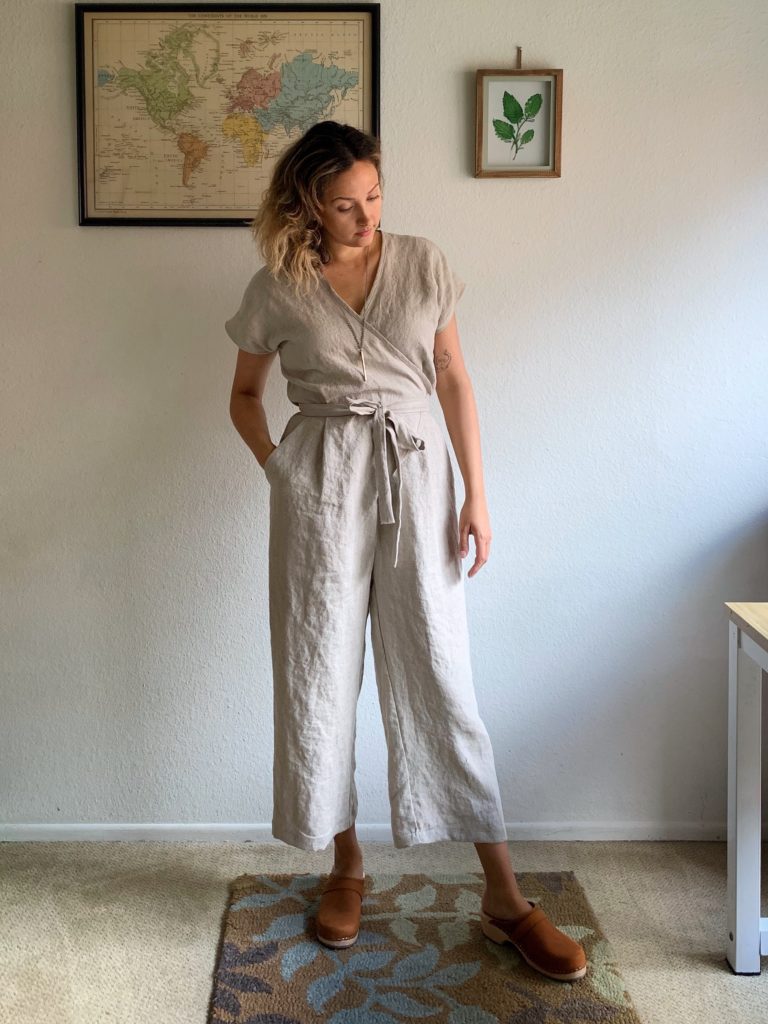
There is a lot of ease built in to the Zadie Pattern. Luckily due to all of the Zadie stalking I was doing on Instagram I saw that sizing down one or even two sizes was recommended. I decided to size down one size to a 12 and jumped right into cutting my beautiful linen.
A note on this fabric:
This is a 100% linen from my local Joann. Sometimes the quality of Joann’s linens surprises me and I just adore this fabric. It washed up beautifully and was lovely to press and sew. I could live in linen, that wrinkly-sustainable -cool-breathable fabric of dreams.
Another note:
I realize that Instagram deserves some love right here. If you don’t already know (and you really should) you can follow specific hashtags. This is such an amazing feature for anyone looking for sewing inspiration or, if you’re like me, prefer to do some research on a pattern before investing in it. It may have taken me a lot longer to sew this pattern if I hadn’t been following the #zadiejumpsuit hashtag! I can’t say enough about this feature.
This pattern, as I mentioned earlier, has a lot of ease and the fit through the hips and legs is very generous. I’m 5’8″ tall and I’d say the crotch sits pretty low. No complaints there and I do like the look of it. Plus, who wants a wedgie every time we lift an arm? However, since my bottom half is on the small side (compared to my upper half) I decided to take an extra inch out along the inseam and crotch.
So, to clarify I did size down one size and continued to sew the pattern according to the directions. The directions are very clear and thorough. It recommends when to finish certain seams which I like. It’s detailed enough that even an experienced sewer has to pay attention and not skip ahead. This is my first time using a Paper Theory pattern and won’t be the last! After completion I walked around in my new jumpsuit to assess the fit.
To do this I unpicked the center crotch area where the inside leg seams meet the crotch seams. I re-sewed the inseams on both inside legs increasing the seam allowance by an inch, which in turn took two whole inches out of the width of each leg. After finishing seams I then re-sewed the crotch seam between the legs and called it good. This made a huge improvement in the fit.
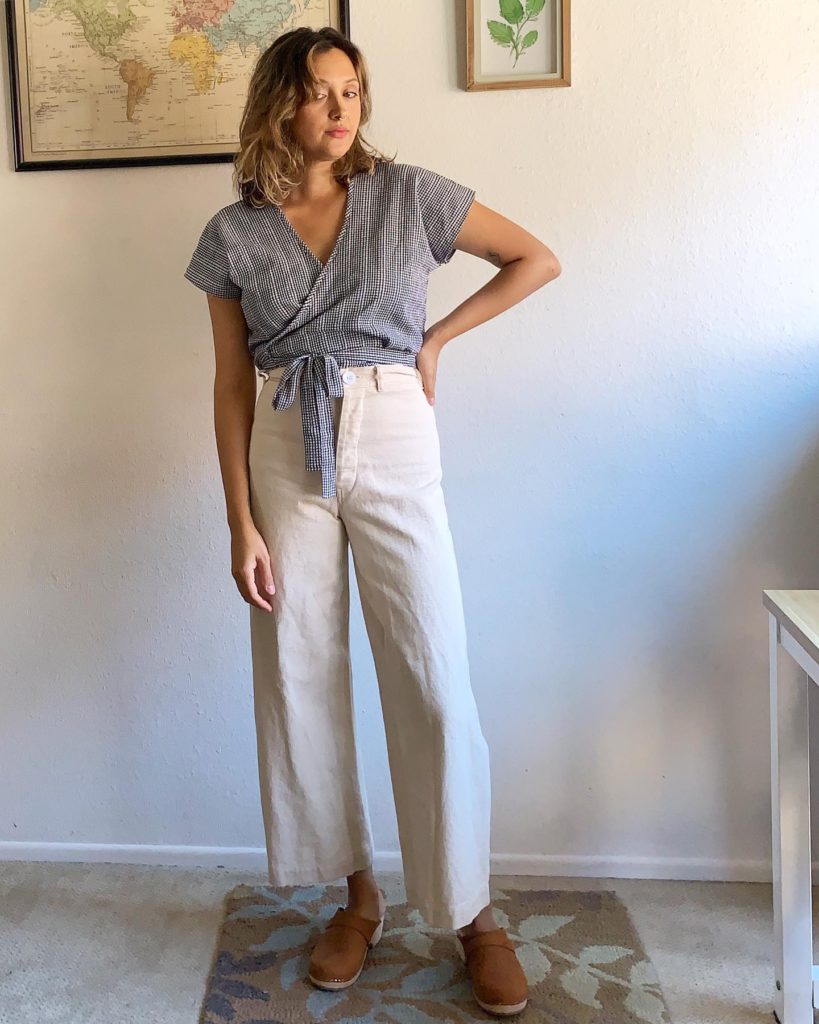
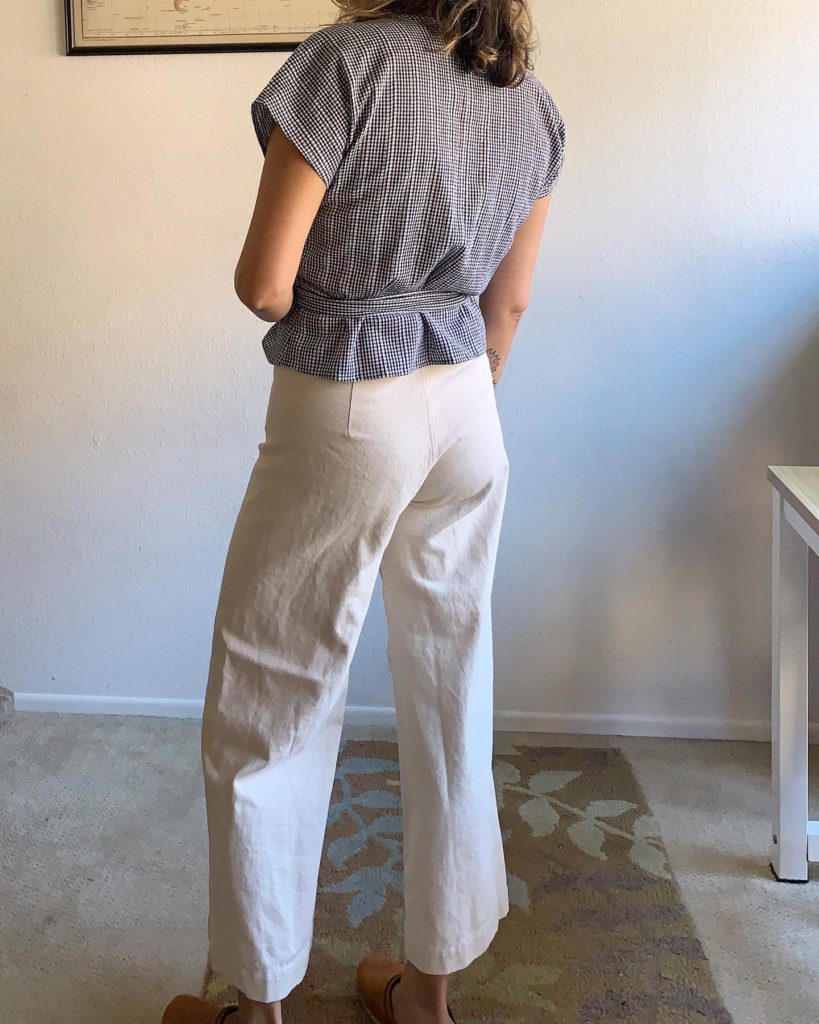
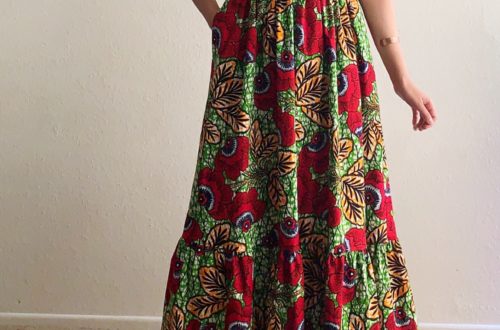
Version 2 – A Zadie Top
For the second round I hacked the Zadie pattern to make a wrap top. I decided to size down one more size for my top (so two sizes down from my measurements) and really love the end result. For my next jumpsuit I’ll try sizing down two whole sizes again through the bodice and pants, but may lengthen the bodice an inch being sure to lower the strap opening. The opening at the side seam where the strap passes through must be lowered to sit at my natural waistline. A funny thing: my top is wrapped the opposite way due to the fact that I did not follow the directions this time around and sewed it from memory. I’ll make sure to refer to the directions again next time I sew this!
Coincidently, this airy cotton fabric is also from Joann and is another winner! I love wearing this top. It’s so soft and will be oh so comfy in the summer heat. It has a delicate lace pattern that runs vertically and it has a kind of vintage touch that I love. Along with this black colorway, it’s also available in a red that is equally adorable.
The only alteration I made to create this top was to add 4 inches of length to the bottom of the bodice at the side seams. I curved the hem slightly, literally just eyeballing it as I cut with my rotary cutter. When sewing I omitted the pleats, and sewed a rolled hem. The simplest pattern hack! I’d say this top is still slightly cropped so keep that in mind if you attempt this hack. Next time I will definitely lower that side seam opening. A 1.5 yard piece was plenty to cut out this top but I did have to piece together the straps, cutting 4 pieces instead of 2.
Needless to say, I’m glad I pulled the trigger on the Zadie Jumpsuit. I think a sleeved version would look really cool in a bright cotton stripe, hopefully giving off some Ace & Jig vibes. Thank you so much for reading! I hope this inspires more new Zadie makes. Please let me know if it does! Xx
Also pictured…
Lotta From Stockholm clogs
Persephone Pants pattern in white 10oz bull denim


9 Comments
Sherry minkowski
Thanks for all this info. I’m tiny and don’t like a lot of ease, especially in pants, so knowing that a lot of ease is built in will help me pick the right size. Joanna DOES have some great fabrics, if you’re willing to spend a lot of time looking through some really awful stuff. Both these pieces came out beautifully and look lovely on you!
Angie Hook
Glad to know this was helpful. Thank you so much for reading and supporting! Good luck on your make! ❤️
Tabitha Gandee
This is really helpful info! I’m planning to make a top version as well. I was wondering how much of the bias tape you needed for the top version? I’m really hoping mine turns out as well as yours did!
Angie Hook
Hi! Thanks so much for reading! I believe I cut 3 shorter strips using my ruler and rotary cutter and I didn’t bother measuring. I’d imagine you wouldn’t need much less than what’s required for the full jumpsuit. I’m so used to cutting my own bias. I just eyeball it and would rather have more than too little! ❤️ Good luck with your make!
Elle
What yardage did you need for the top? Love both pieces so much!
Angie Hook
Hi! Thanks so much! As stated in the blog I used 1.5 yards and I believe the fabric was 45″ wide. xx
Veronique
Ahhh I’m so loving the jumpsuit! Beautiful and looks great on you!
Lezlie
Thank you for all the helpful information!
Cecelia
I’m just beginning to sew my own wardrobe and am finding your blog to be just incredible and so very helpful- your taste is so exquisite- and I love your version better than any other every time! So grateful for all of your tips! Thank you for sharing your beautiful work!